ラズパイ3・4にインストールしたものメモ
インストールしたもののメモです。古い項目もあってRaspberry pi 5ではできないものもあります。ご了承ください。
UpgradeとUpdate
まずはコレをやっとく。
$ sudo apt-get update && sudo apt-get upgrade -y
Vim
入ってないので入れる([y/n]が出るので-yオプションで常時「Y」を押す。)
sudo apt-get -y install vim
シャットダウン ボタン
ボタンをGPIO3とGNDにさす。
sudo vim /boot/config.txt
sudo vim /boot/firmware/config.txt #OSがDebian GNU/Linux 12 (bookworm)の場合
dtoverlay=gpio-shutdown,gpio_pin=3,debounce=1000
この方法はi2cとかぶるのでやらないほうが良さそう。以下のエラーになった。
[    2.161882] pinctrl-bcm2835 fe200000.gpio: pin gpio3 already requested by fe804000.i2c; cannot claim for soc:shutdown_button@3
[    2.162033] pinctrl-bcm2835 fe200000.gpio: pin-3 (soc:shutdown_button@3) status -22
[    2.162113] pinctrl-bcm2835 fe200000.gpio: could not request pin 3 (gpio3) from group gpio3  on device pinctrl-bcm2711
[    2.162215] gpio-keys soc:shutdown_button@3: Error applying setting, reverse things back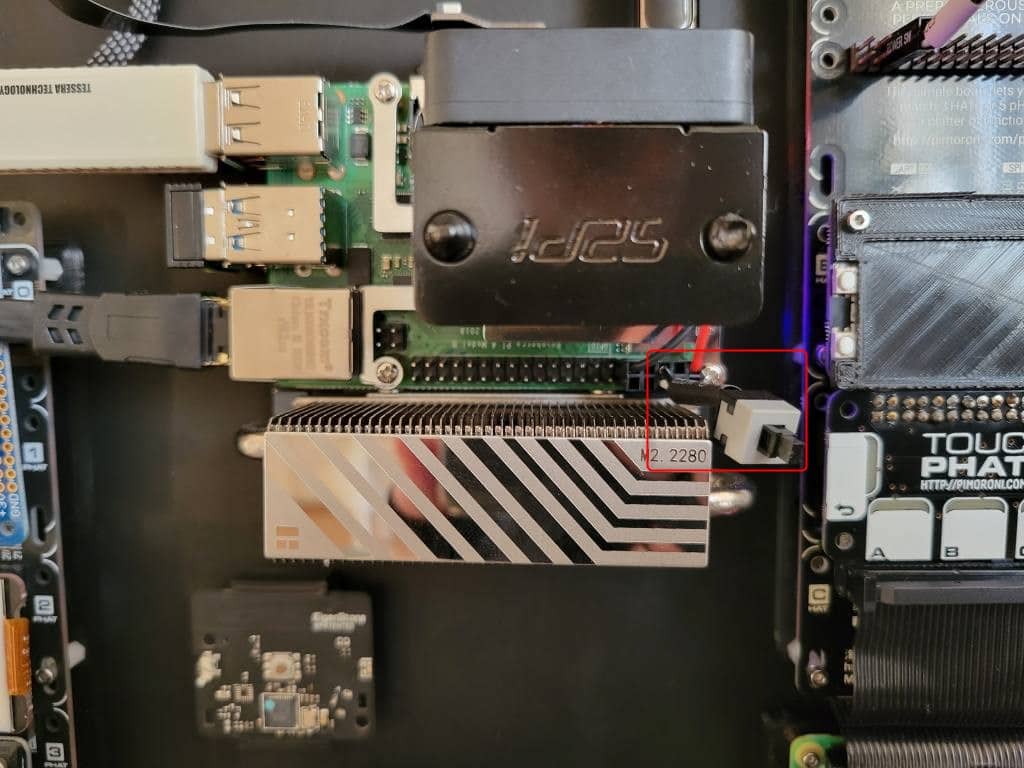
ntp 時刻サーバー
Fluentdでログ収集サーバーとして使うラズパイは時刻をあわせるのに必要。
インストール
sudo apt-get -y install ntp
設定
sudo vim /etc/ntp.conf
以下のように元からあったサーバーをコメントアウト
#pool 0.debian.pool.ntp.org iburst
#pool 1.debian.pool.ntp.org iburst
#pool 2.debian.pool.ntp.org iburst
#pool 3.debian.pool.ntp.org iburst

#追加↓
pool ntp.nict.jp iburst
再起動
sudo service ntp restart
確認
date
2019年 1月 17日 木曜日 06:06:35 JST
このようになった。
ntpdateインストール
時刻合わせコマンドですぐに時刻を合わせる。
sudo apt-get install ntpdate
sudo ntpdate -v ntp.nict.jp
日本時刻にする
sudo timedatectl set-timezone Asia/Tokyo
ラズパイ 空冷ファン追加
3Dプリンター用のラズパイ3BのCPUが60度以上の高温になるので空冷ファンを追加した。
60度以上になってくると熱暴走するみたい。
まずは4PinのJetson Nano用の40mm角のファンが1つ余っているのでそれを利用して、後ほどヒートシンク付きのファンも導入した。
Jetson Nano用のファンは4Pinなのでピンを3本だけ使ってGPIOに合うようにする。
GND・5V・TXに差す。
raspi-config でファン設定
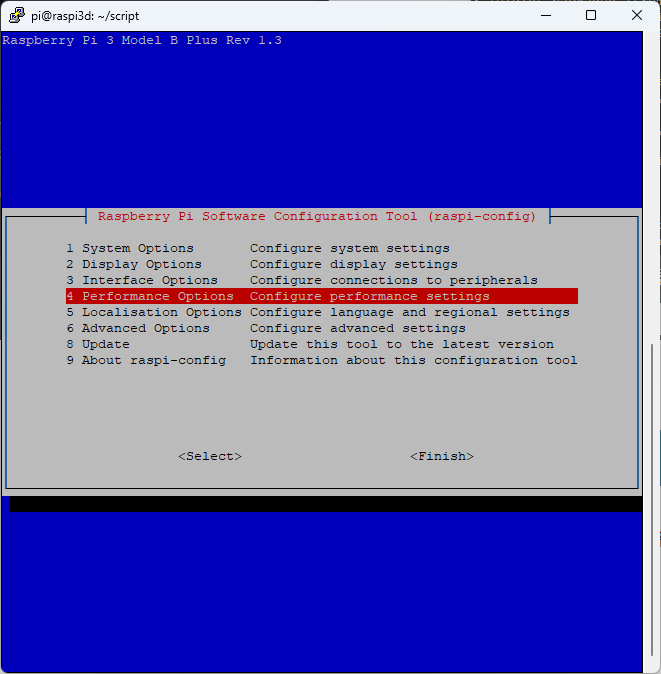
sudo raspi-configPerformance Optionsを選ぶ。
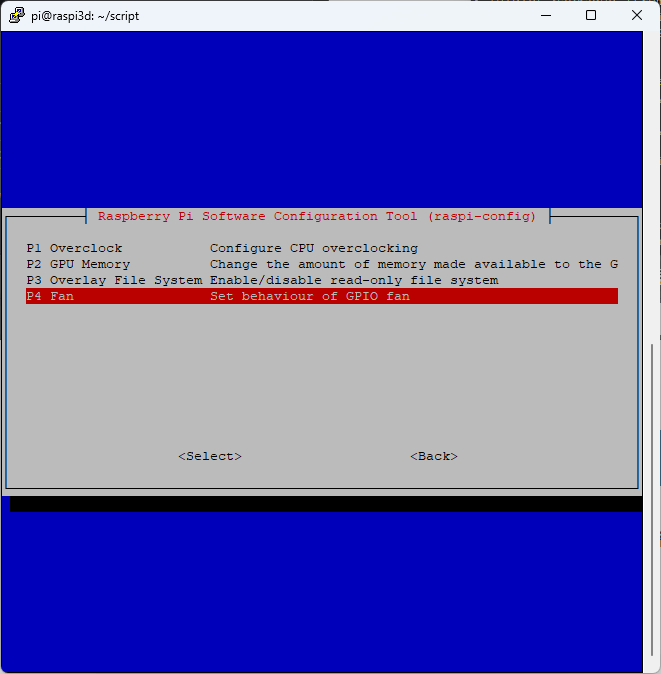
続いてFanを選ぶ。
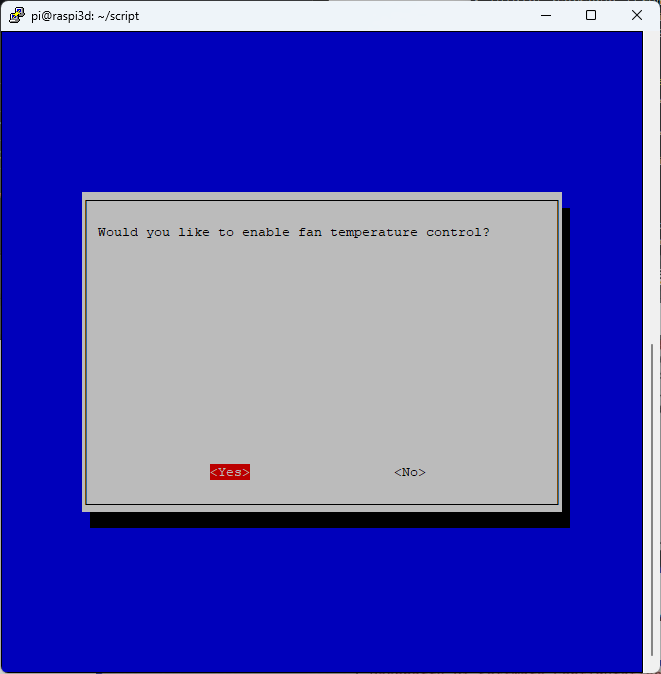
最後にYesを選んで終了。
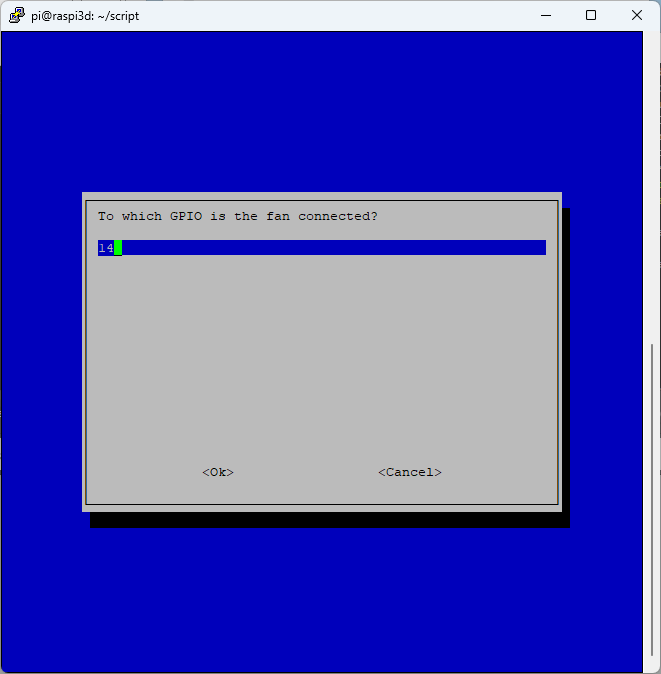
GPIO14がデフォルト TXケーブルをどこにさすか
デフォルトでGPIO14が表示されている。GPIO14は右上の5V/5V/GNDの下で、ここにTXのピンをさせばOK.
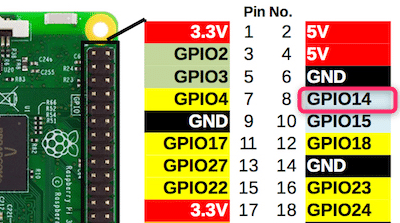
GPIO14を他のセンサーで使用中ならば変更可能↓
温度設定
続いて一定以上の温度になったらファンを回す設定。
50度にしましたが、60~120度の間で設定しないといけないようです。
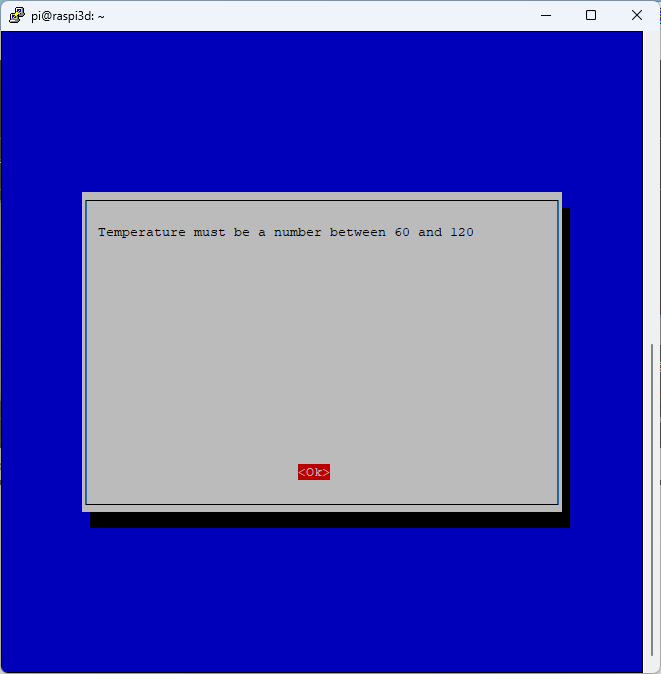
仕方がないので60度にする。
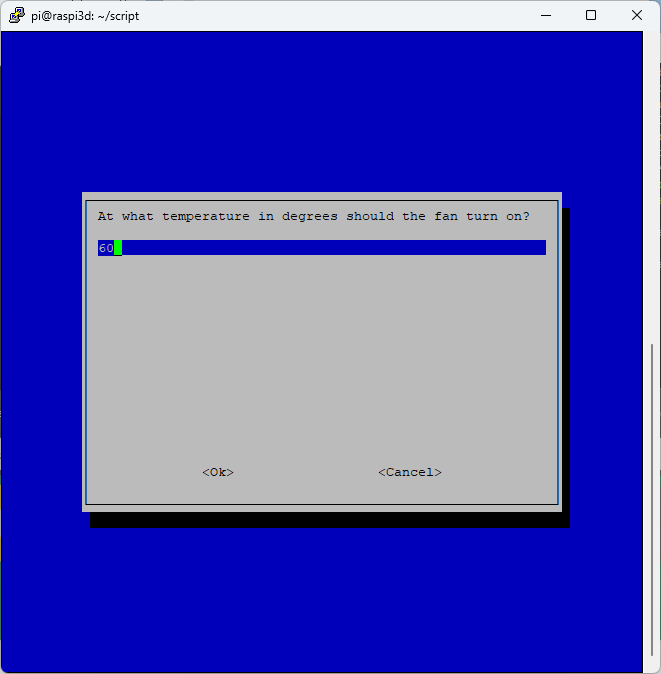
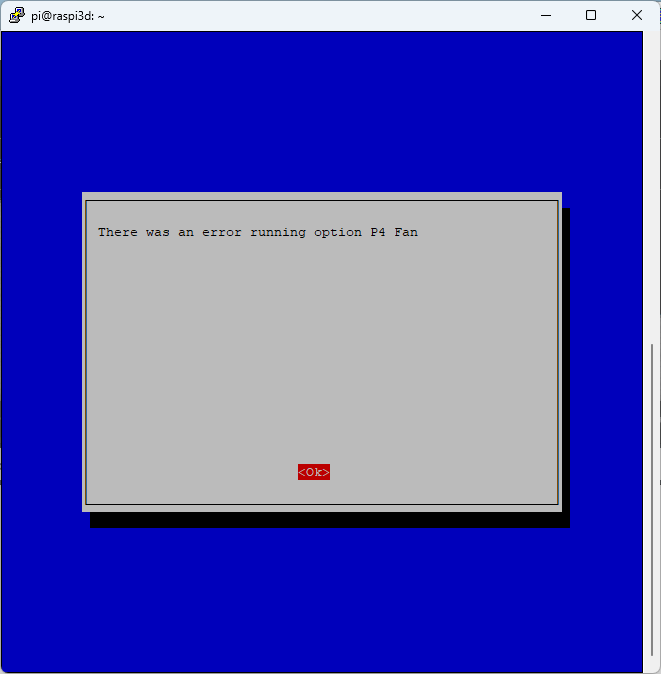
エラーになる
60度以下にするとエラーになる。
変更チェック
sudo vim /boot/config.txt

以下の項目が追加されている。
dtoverlay=gpio-fan,gpiopin=14,temp=80000
Linux バージョン確認
sudo apt-get install lsb-release
詳細確認
$ lsb_release -a
No LSB modules are available.
Distributor ID: Raspbian
Description:    Raspbian GNU/Linux 9.6 (stretch)
Release:        9.6
Codename:       stretch
I2C
I2Cを有効にする設定
以下のように raspi-config でI2Cを有効にします。
$ sudo raspi-config
Interfacing Options > I2C > enabled
snd-bcm2835を追加
サウンドモジュールを追加する例。
$ sudo vim /etc/modules
snd-bcm2835 ←追加
i2c-dev
ツールインストール
$ sudo sudo apt-get install libi2c-dev共有ライブラリ設定
$ sudo vim /etc/ld.so.conf
include /etc/ld.so.conf.d/*.conf
/usr/local/lib ←追加

$ sudo ldconfig
i2cdetectで認識されているか確認
I2Cのセンサーをつなぐと↓74・76などが表示される。つないだI2Cのセンサーの分だけ表示。
sudo i2cdetect -y 1
     0  1  2  3  4  5  6  7  8  9  a  b  c  d  e  f
00:                         -- -- 0a -- -- -- -- --
10: -- -- -- -- -- -- -- -- -- -- -- -- -- -- -- --
20: -- -- -- -- -- -- -- -- -- -- -- -- 2c -- -- --
30: -- -- -- -- -- -- -- -- -- -- -- -- -- -- -- --
40: -- -- -- -- -- -- -- -- -- -- -- -- -- -- -- --
50: -- -- -- -- -- -- -- -- -- -- -- -- -- -- -- --
60: -- -- -- -- -- -- -- -- -- -- -- -- -- -- -- --
70: -- -- -- -- 74 -- 76 --
I2Cは複数の違う種類のセンサーを繋げられるが、同じセンサーを2つつなぐ場合はIDを変更する必要がある。
SPI
SPIを有効にする設定
以下のように raspi-config でSPIを有効にします。
$ sudo raspi-config
Interfacing Options > SPI > enabled
軽量ブラウザ Kweb
$ wget http://steinerdatenbank.de/software/kweb-1.7.9.8.tar.gz
$ tar -xzf kweb-1.7.9.8.tar.gz
$ cd kweb-1.7.9.8
$ ./debinstall
dstat
リアルタイムにサーバの状態を表示してくれる。
$ sudo apt-get install dstat
$ dstat
You did not select any stats, using -cdngy by default.
----total-cpu-usage---- -dsk/total- -net/total- ---paging-- ---system--
usr sys idl wai hiq siq| read  writ| recv  send|  in   out | int   csw
  6   1  92   0   0   0|3853B   12k|   0     0 |   1B   24B|4535  4484
  1   0  99   0   0   0|   0     0 |  80B 1004B|   0     0 |2371   201
  1   2  97   0   0   1|   0     0 | 116B  496B|   0     0 |5349  6122
1秒おきにずっと表示が続いていく。
Apache2インストール
sudo apt-get install apache2 libcgi-pm-perl
MySQL
インストールすると?MariaDBが入った。2023年ごろ?からは「sudo apt install -y mariadb-server」でインストールする。
sudo apt-get install mysql-server
sudo vim /etc/mysql/my.cnf

$ sudo mariadb
Welcome to the MariaDB monitor.  Commands end with ; or \g.
Your MariaDB connection id is 2
Server version: 10.1.37-MariaDB-0+deb9u1 Raspbian 9.0

Copyright (c) 2000, 2018, Oracle, MariaDB Corporation Ab and others.

Type 'help;' or '\h' for help. Type '\c' to clear the current input statement.

MariaDB [(none)]> use mysql;
Reading table information for completion of table and column names
You can turn off this feature to get a quicker startup with -A

Database changed
MariaDB [mysql]>
一応ログインはできたみたい。

sudo su
mysql -u root
update mysql.user set password=password('16') where user = 'root';

sudo systemctl restart mysqld.service

$ sudo systemctl start mariadb.service
$ sudo /usr/bin/mysql_secure_installation

NOTE: RUNNING ALL PARTS OF THIS SCRIPT IS RECOMMENDED FOR ALL MariaDB
      SERVERS IN PRODUCTION USE!  PLEASE READ EACH STEP CAREFULLY!

In order to log into MariaDB to secure it, we'll need the current
password for the root user.  If you've just installed MariaDB, and
you haven't set the root password yet, the password will be blank,
so you should just press enter here.

Enter current password for root (enter for none):
Aborting!

パスワード設定しても??入れない!!↓
$ mysql -u root  -p
Enter password:
ERROR 1698 (28000): Access denied for user 'root'@'localhost'
$ mariadb -u root -p
Enter password:
ERROR 1698 (28000): Access denied for user 'root'@'localhost'
このように変更。
 $ sudo mariadb
Welcome to the MariaDB monitor.  Commands end with ; or \g.
Your MariaDB connection id is 25
Server version: 10.1.37-MariaDB-0+deb9u1 Raspbian 9.0

Copyright (c) 2000, 2018, Oracle, MariaDB Corporation Ab and others.

Type 'help;' or '\h' for help. Type '\c' to clear the current input statement.

MariaDB [(none)]> use mysql;
Reading table information for completion of table and column names
You can turn off this feature to get a quicker startup with -A

Database changed
MariaDB [mysql]> select user,password,plugin from user;
+------+-------------------------------------------+-------------+
| user | password                                  | plugin      |
+------+-------------------------------------------+-------------+
| root | *AD32FD65062E11F28615AF007C00472353B8889B | unix_socket |
+------+-------------------------------------------+-------------+
1 row in set (0.00 sec)
MariaDB [mysql]> update user set plugin='' where user='root';
Query OK, 1 row affected (0.00 sec)
Rows matched: 1  Changed: 1  Warnings: 0

MariaDB [mysql]> select user,password,plugin from user;

+------+-------------------------------------------+--------+
| user | password                                  | plugin |
+------+-------------------------------------------+--------+
| root | *AD32FD65062E11F28615AF007C00472353B8889B |        |
+------+-------------------------------------------+--------+
1 row in set (0.00 sec)

MariaDB [mysql]>
MariaDB [mysql]> flush privileges;
Query OK, 0 rows affected (0.00 sec)
こんどはmysql -u root -pでパスワードを入れてMariaDBには入れるようになった。
Hostname変更
ラズパイが増えたのでどれがどれだか分かるように変更
$ sudo vim /etc/hostname
raspberrypi
  ↓
Raspi3Bp

$ sudo vim /etc/hosts
127.0.1.1       raspberrypi
  ↓
127.0.1.1       Raspi3Bp
これでRebootすると「pi@Raspi3Bp:~ $」このように表示される。
ホントはRaspi3B+にしたかったけど「+」は書けないのでRaspi3Bpにした。
パスワード変更
ユーザー「pi」のパスワードを変更する。
pibakeryで作ったRaspbianのパスワードがデフォルトで「raspberry」なので変更する。
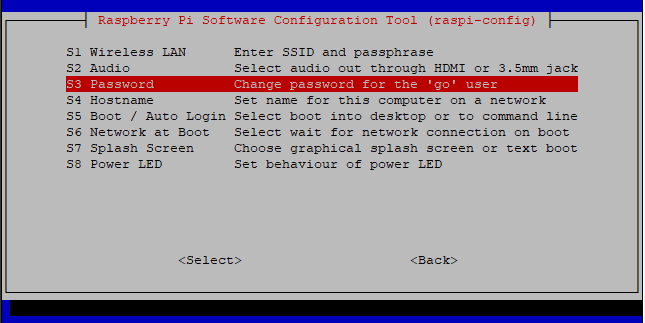
raspi-configで変更
sudo raspi-configSystem Options > Password
New password:
Retype new password:
passwd: password updated successfully
コマンド
passwd停止するプロセス
GUIや必要のないプロセスをストップする。
動いているプロセスをストップする。
$ ps ax
  PID TTY      STAT   TIME COMMAND
    1 ?        Ss     0:06 /sbin/init splash
    2 ?        S      0:00 [kthreadd]
    3 ?        I<     0:00 [rcu_gp]
Xorgなどを止めてみる。
$ sudo systemctl disable lightdm
Synchronizing state of lightdm.service with SysV service script with /lib/systemd/systemd-sysv-install.
Executing: /lib/systemd/systemd-sysv-install disable lightdm
Removed /etc/systemd/system/display-manager.service.
GUI・CUIに変更
GUI
$ sudo systemctl set-default graphical.target
CUI
sudo systemctl set-default multi-user.target
GUIでの操作は左上のメニュー 設定 > Raspberry Piの設定 > システム のブートを「デスクトップ」にする。
samba(ファイル共有)
samba インストール
sudo apt-get install samba samba-common-bin
共有設定
共有したいフォルダを一番下に追加
cd /etc/samba/
sudo cp -a smb.conf smb.conf.default

sudo vim /etc/samba/smb.conf
[pi]
path = /home/pi
browsable = yes
writable = yes
guest ok = no
read only = no
sudo smbpasswd -a pi
Passを2回聞かれるsmb.conf を再読み込みする(リロード)
sudo smbcontrol smbd reload-configWindowsのネットワークで見れるようにする
Windowsで見るようにするにはwsdd2が必要
sudo apt install wsdd2
sudo systemctl enable --now wsdd2.service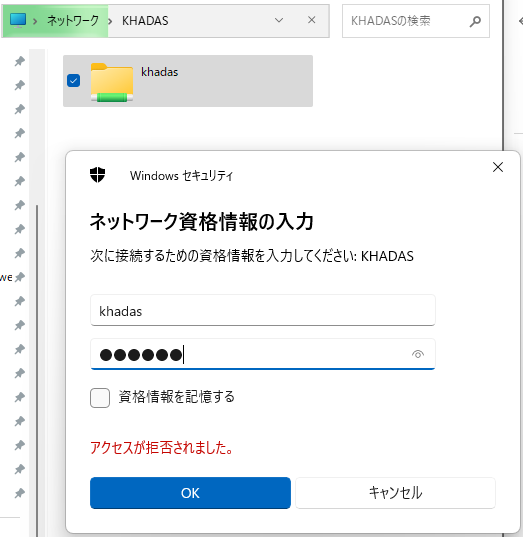
起動・ストップ
sudo service smbd stopスライドショー(CUIで運用する場合のみ)
ラズパイでディスプレイを接続していて使わない時はランダムにAI画像などを表示させる設定。
この方法(fbiを使ったスライドショー)はGUI(グラフィックユーザーインターフェース)の場合は使えません。CUI(キャラクターユーザーインターフェース)のみで使用可。
GUIへ切り替え
$ sudo systemctl set-default graphical.target
CUIへ切り替え
sudo systemctl set-default multi-user.target
Raspi4Bはraspi-configでカメラをオンにするとディスプレイが表示されなくなる。(Raspbian GNU/Linux 11 (bullseye)以降だとそうなるみたい。/boot/config.txtの末尾にdtoverlay=ov5647追加するといける?)
Jetson nanoはログインしないと表示されない。
fbi

CUIで画像を表示する。
sudo apt install fbiSSHでは表示できない。画像ディレクトリは「/home/go/pict」にJPGのAI画像を入れた設定。
fbi /home/go/pict/10.jpgSSHからラズパイにつないでいるディスプレイに表示させるにはsudoで-T 1をつける。
sudo fbi -T 1 /home/go/pict/2.jpgフレームバッファのサイズ、 480×960
fbset
mode "480x960"
    geometry 480 960 480 960 16
    timings 0 0 0 0 0 0 0
    accel true
    rgba 5/11,6/5,5/0,0/0
endmode

#IGZO:1200x1920の場合
mode "1200x1920"
    geometry 1200 1920 1200 1920 16
    timings 0 0 0 0 0 0 0
    accel true
    rgba 5/11,6/5,5/0,0/0
endmode
たしかimagemagickも必要だと思った。
sudo apt -y install imagemagickシェルスクリプト
sudo vim /home/go/script/slideshow.sh
#!/bin/bash
fbi -noverbose -t 60 -u /home/go/pict/*.jpg
#SSD↓に保存した
fbi -noverbose -t 60 -u /mnt/play2t/pict_Raspi4B/*.jpg
実行権の付与
sudo chmod +x /home/go/script/slideshow.shprofileで自動起動
sudo vim /etc/profile
最後に入力
/home/go/script/slideshow.sh
cronで定期的に実行する場合 失敗
fbiコマンドが無限ループなので、起動しているslideshow.shがあればKillして再度slideshow.shを実行するようにしたいがうまく動かない。
#!/bin/bash

# スクリプト名を取得
script_name=$(basename "$0")

# 同じスクリプトの他のインスタンスが実行中であるかどうかをチェック
other_pid=$(pgrep -x "$script_name" | head -n 1)

# もし他のインスタンスが実行中であれば、それを終了
if [ ! -z "$other_pid" ]; then
    kill -9 "$other_pid"
fi

# ディスプレイ環境変数を設定
export DISPLAY=:0
export XAUTHORITY=/home/pi/.Xauthority

fbi -d /dev/fb0 -noverbose -a-fitwidth 1200 -t 60 -u /home/go/pict/*.jpg
上記スクリプトを定期的にcronで実行していきます。killを使うのでrootのcronで実行。
sudo crontab -e
*/5 * * * * /bin/sh /home/go/script/slideshow.sh
cronでは動かなかった・・・
GUI時のバックライト調節
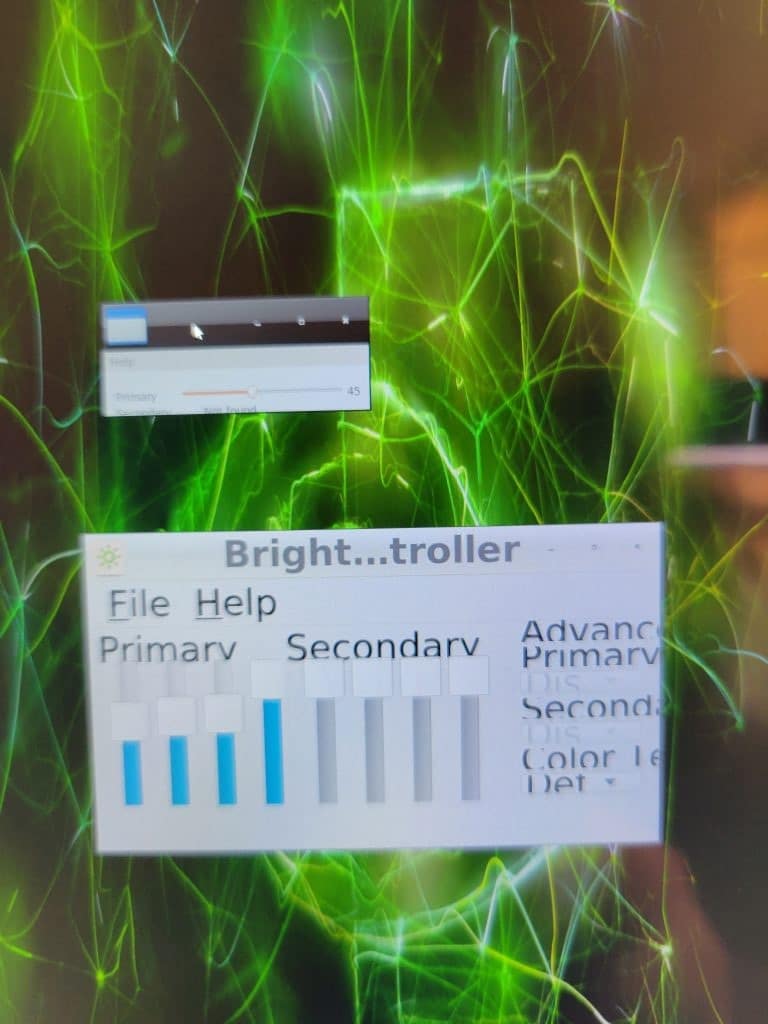
brightness-controller
GUIのみで動作可能。CUIだとまったく動作しない。
sudo apt-get update
sudo add-apt-repository ppa:apandada1/brightness-controllersudo apt-get install brightness-controlle
xrandr
Can't open display
GUIでやらないと動かない。
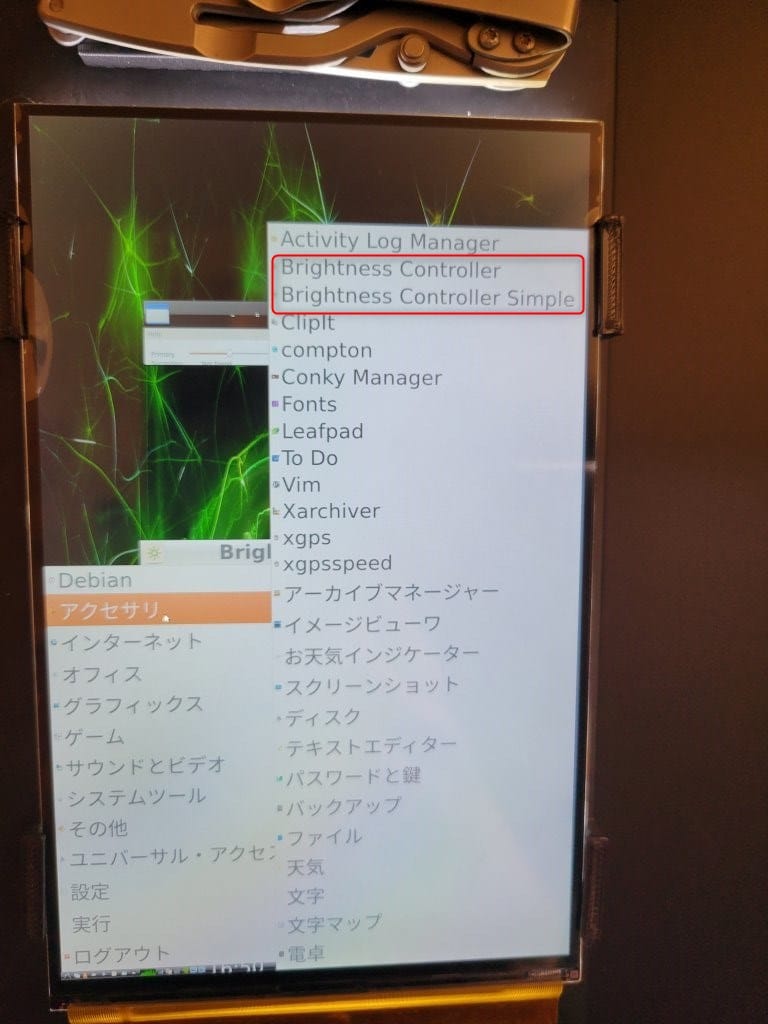
sudo systemctl set-default graphical.targetメニューにBrightness Controller・Brightness Controller Simpleの2つ追加される。
SSD情報取得
sudo apt install smartmontools温度は計測できない?
sudo smartctl -i /dev/sda1
smartctl 7.2 2020-12-30 r5155 [aarch64-linux-5.4.180] (local build)
Copyright (C) 2002-20, Bruce Allen, Christian Franke, www.smartmontools.org

=== START OF INFORMATION SECTION ===
Vendor:               M
Product:              31CG
Revision:             1.00
Compliance:           SPC-4
User Capacity:        2,000,398,934,016 bytes [2.00 TB]
Logical block size:   512 bytes
LU is fully provisioned
Rotation Rate:        Solid State Device
Logical Unit id:      0x3001237923792379
Serial number:        0000000000000000
Device type:          disk
Local Time is:        Sun Aug 13 06:27:58 2023 UTC
SMART support is:     Available - device has SMART capability.
SMART support is:     Enabled
Temperature Warning:  Disabled or Not Supported
こっち↓はHDDのみ?でSSDは「/dev/sda1: JMicron Tech: S.M.A.R.T. not available」と言われる。
sudo apt install hddtempupgradeを自動化
今後も不具合が置きたら手動でアップグレードしたりするのが面倒なので、unattended-upgradesで自動化することにします。
$ sudo apt-get update
$ sudo apt-get install unattended-upgrades #インストール
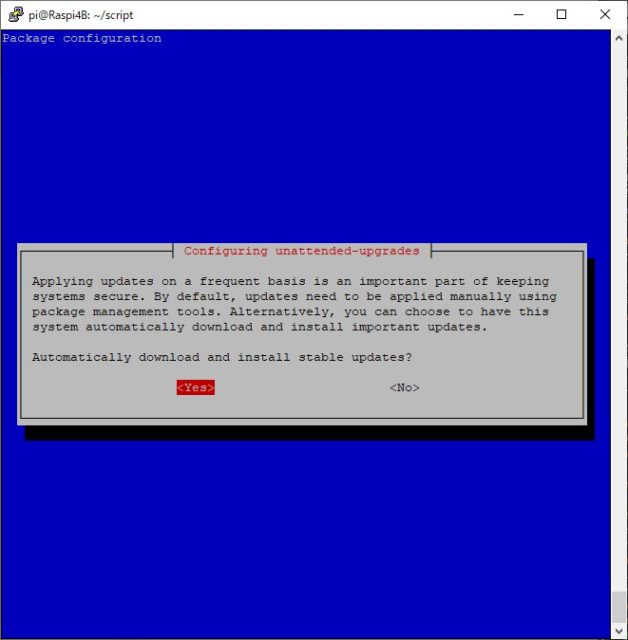
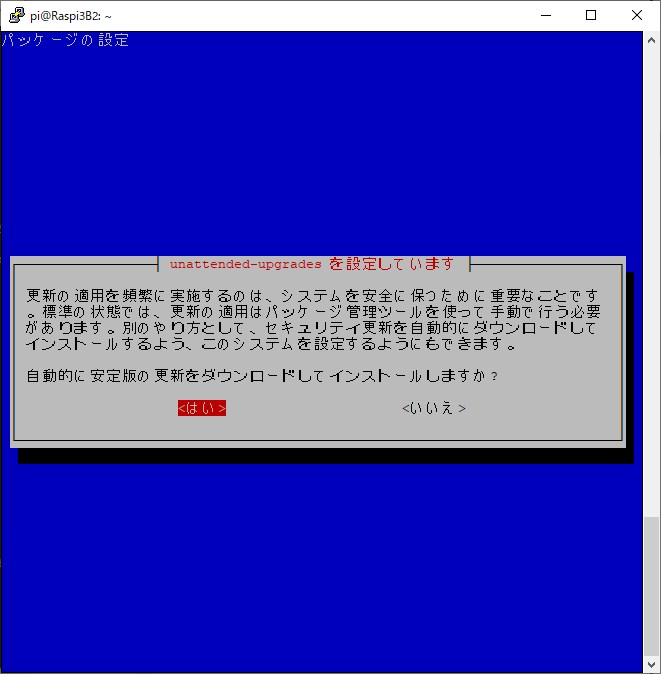
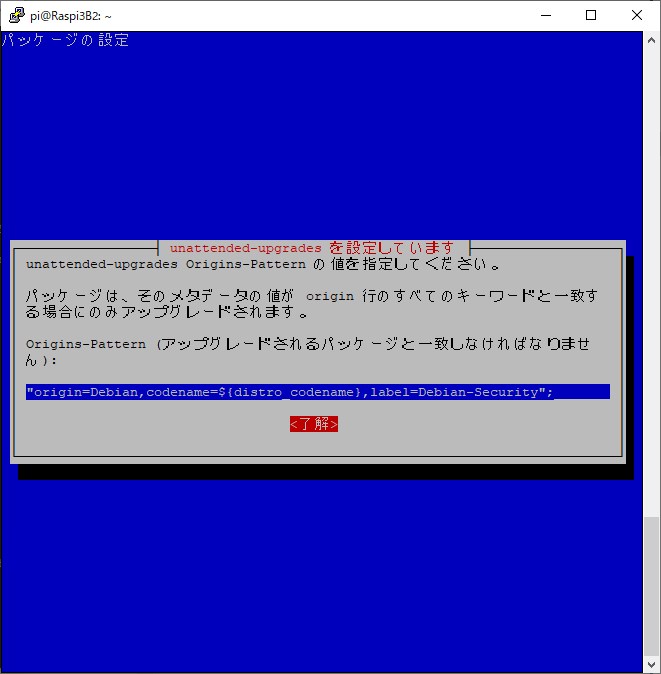
$ sudo dpkg-reconfigure -plow unattended-upgrades
ラズパイ4だと以下のようになりました。
ラズパイ3だとなにやらさらに説明が出た。
設定
設定は以下のようにしました。stableのみアップグレードすることと、アップグレード後に2時に再起動する。
$ sudo vim /etc/apt/apt.conf.d/50unattended-upgrades

      "o=Debian,a=stable";//セキュリティーアップデートの対象パッケージをのみ

//アップグレード後にリブートする
Unattended-Upgrade::Automatic-Reboot-Time "02:00";
unattended-upgradesをインストールしなくても、Cronで以下のようにしてもいけるようです。(毎週月曜日の3時に実行)
0 3 * * 1 apt-get update && sudo apt-get upgrade -y
DHCP 静的IP
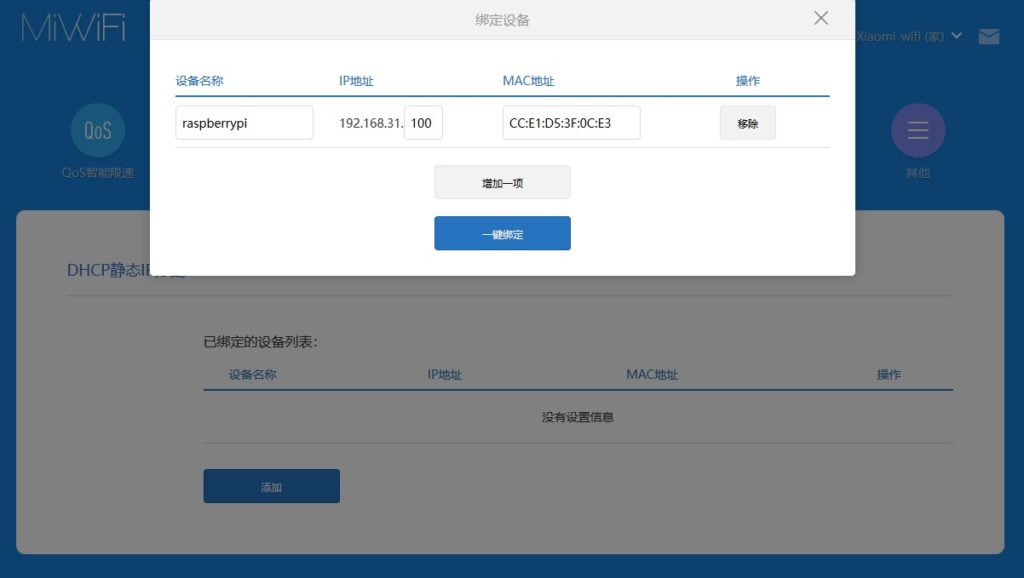
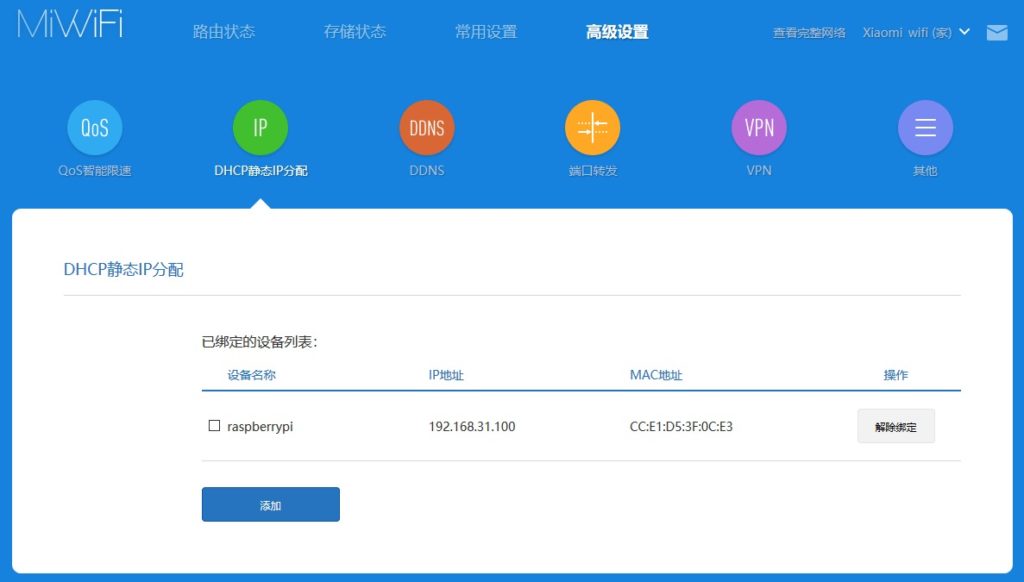
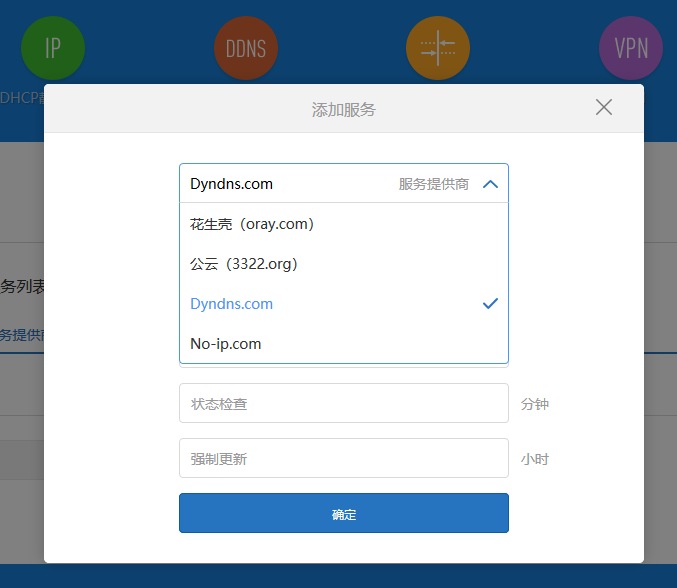
DDNS(ダイナミックDNS)
まだやらない、DNSサーバー選べた。
軽いブラウザ Kwebを入れてみた
標準で入っているFirefoxはラズパイ2にはちょっと荷が重いので軽いブラウザを探したところ、Kwebというのが良さそうなので入れてみる。
Kwebインストール
APTには無いようで、Wgetでダウンロードして手動でインストール
wget http://steinerdatenbank.de/software/kweb-1.7.8.tar.gz
tar -xzf kweb-1.7.8.tar.gz
cd kweb-1.7.8
./debinstall
エラー発生!途中、以下のようなエラーでうまくインストールできないもよう。
sudo: no tty present and no askpass program specified
dpkg: パッケージ kweb の処理中にエラーが発生しました (--install):
サブプロセス インストール済みの post-installation スクリプト はエラー終了ステータス 1 を返しました
アップデートする。↓
sudo apt-get update
これをやって再度./debinstallしたらうまくいった。
Kweb起動
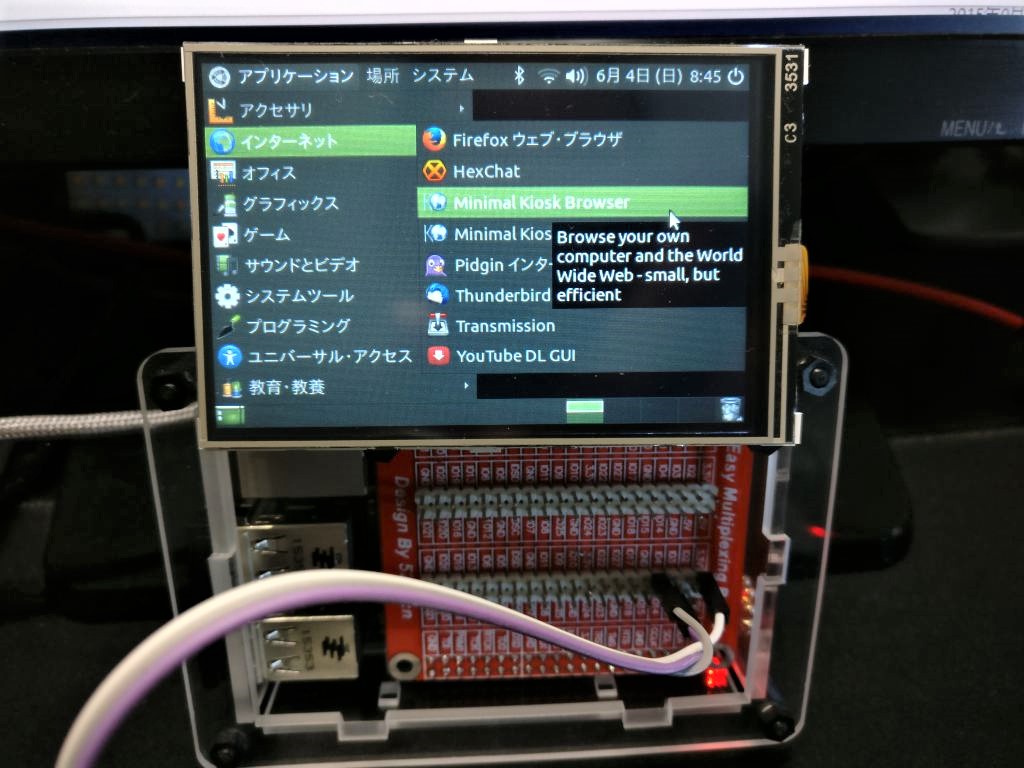
インストールが終わったら以下にショートカットができてました。
アプリケーション > インターネット
正式には、Minimal Kiosk Browserというようです。
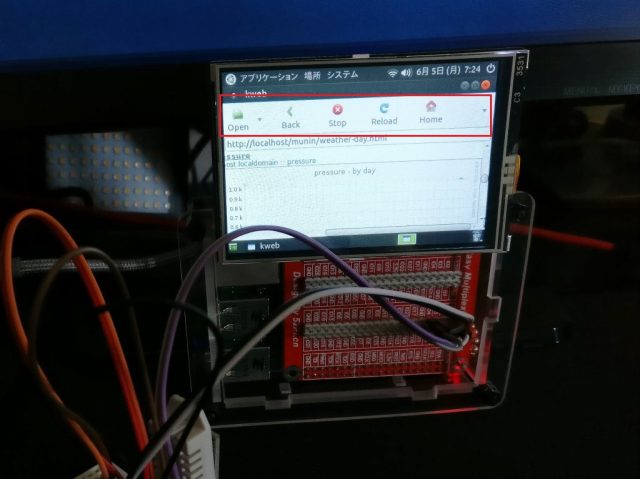
ツールバーがデカデカと表示されて使いづらい
でもこれツールバーを非表示にできない?か設定がどこだか分からないので3.5インチの小さなディスプレイだとツールバーがでかでかと表示されて・・・使いづらい。
「▼」のGo to menu pageにそれらしきものがあるのだが、ゴチャゴチャしていてわかりづらいんです。
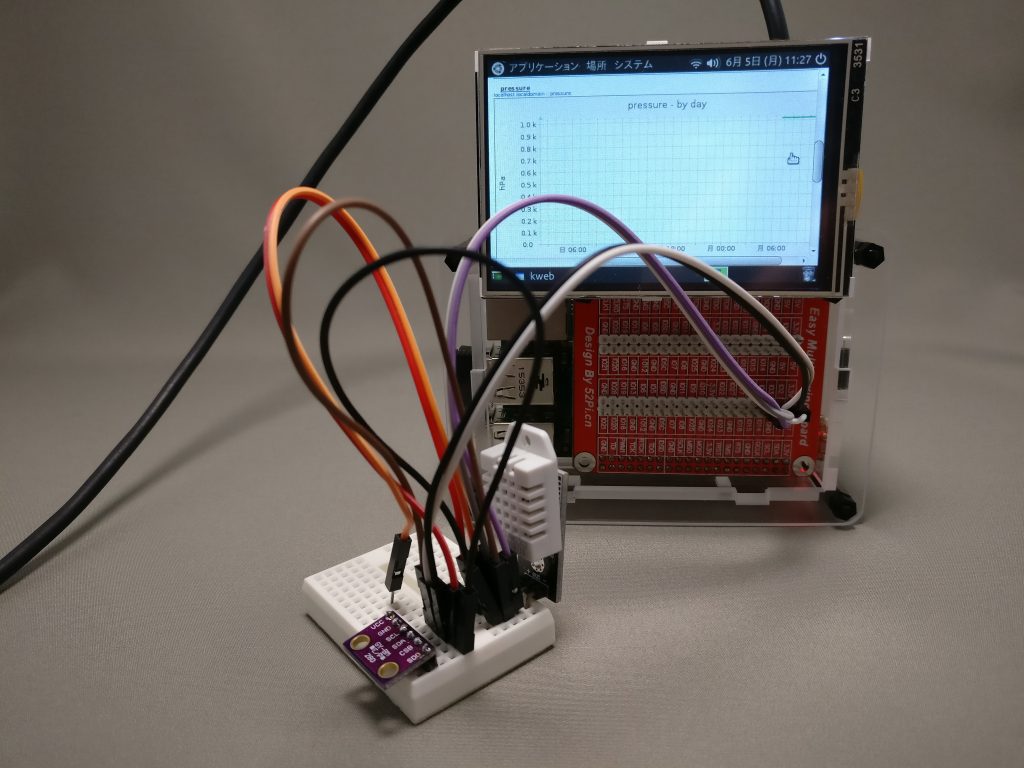
仕方がないので[Alt]+マウスでウィンドウを上にずらしてブラウザの内容のみ表示するようにした。↓
とりあえずウィンドウをずらす作業をKwebを立ち上げるたびにやらないきゃいけないのが面倒なのでそのうち調べて解決します。



コメント