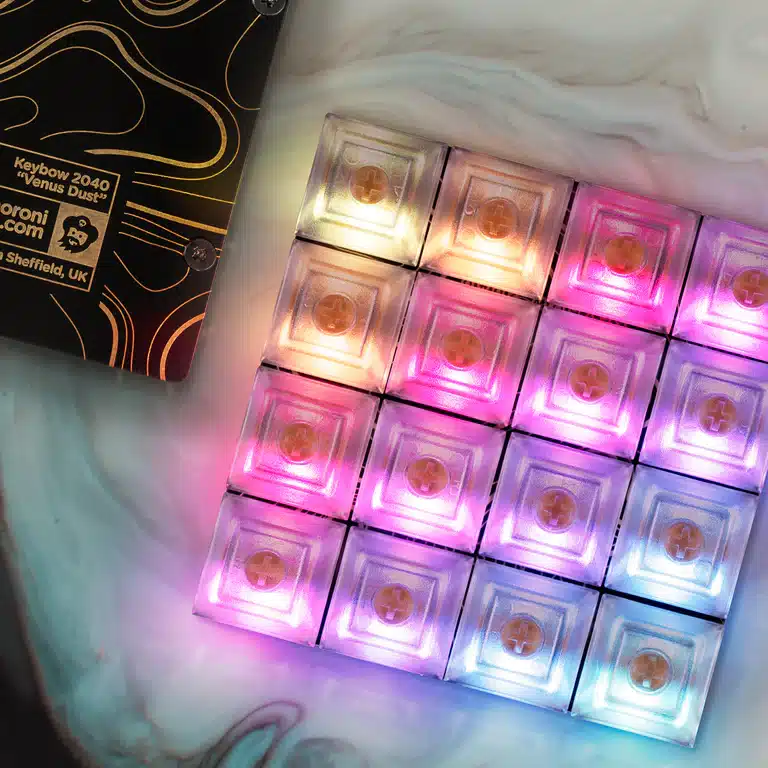
古いRaspberry Pi Zero搭載の古いPimoroniの10キーのキーボード Keybowがウチに転がっていたので、なんとか有効に使える方法はないだろうか?と考えた時にHomeAssistantでスイッチとして使えないかな?と思いやってみました。
結果は大成功!メモ的にHomeAssistantを電源やスイッチとして成功した方法を紹介します。
Pimoroni Keybowとは?
放置状態のKeybow
Keybowは今まで使い道がなかったので、適当に壁の磁石のボードに付けておきました。

USB接続して電源は入っていますが、基本的に飾り状態のKeybow。
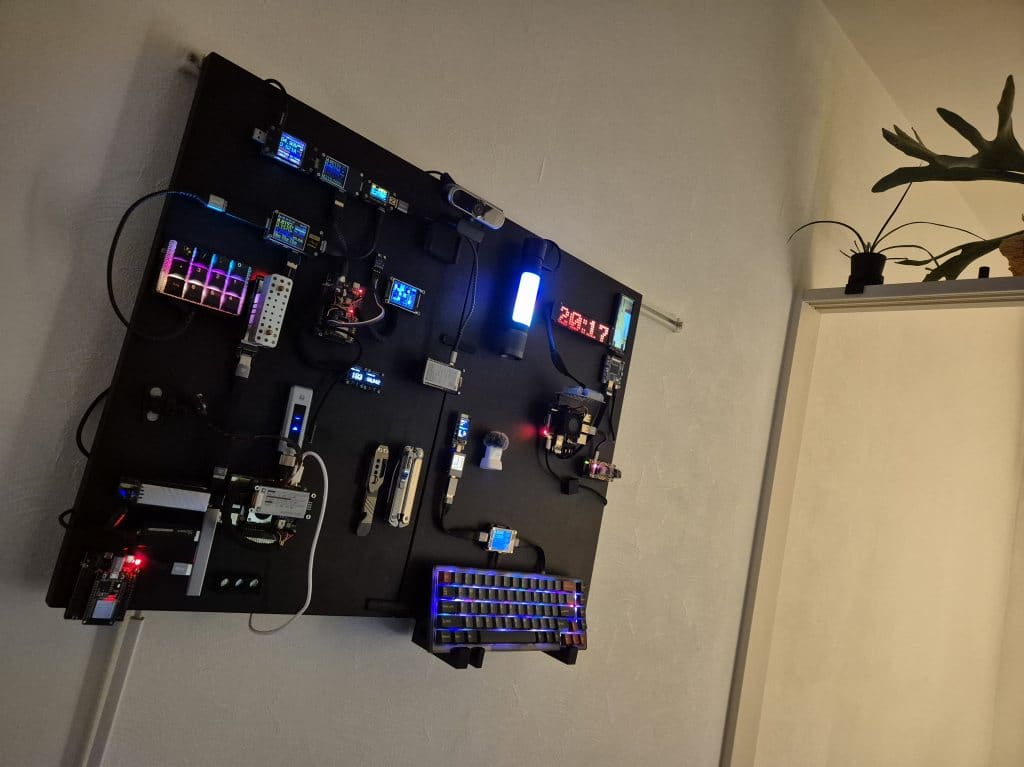
同じく磁石のボードにくっつけてあるRaspberry Pi 5は2TBのSSD3台を接続してファイルサーバーとして、あとHomeAssistantサーバーとして使っています。
キーキャップはメルカリでテンキー用のを買いました。このキーキャップはなかなか見た目が良かった。
Pimoroni Keybowの種類
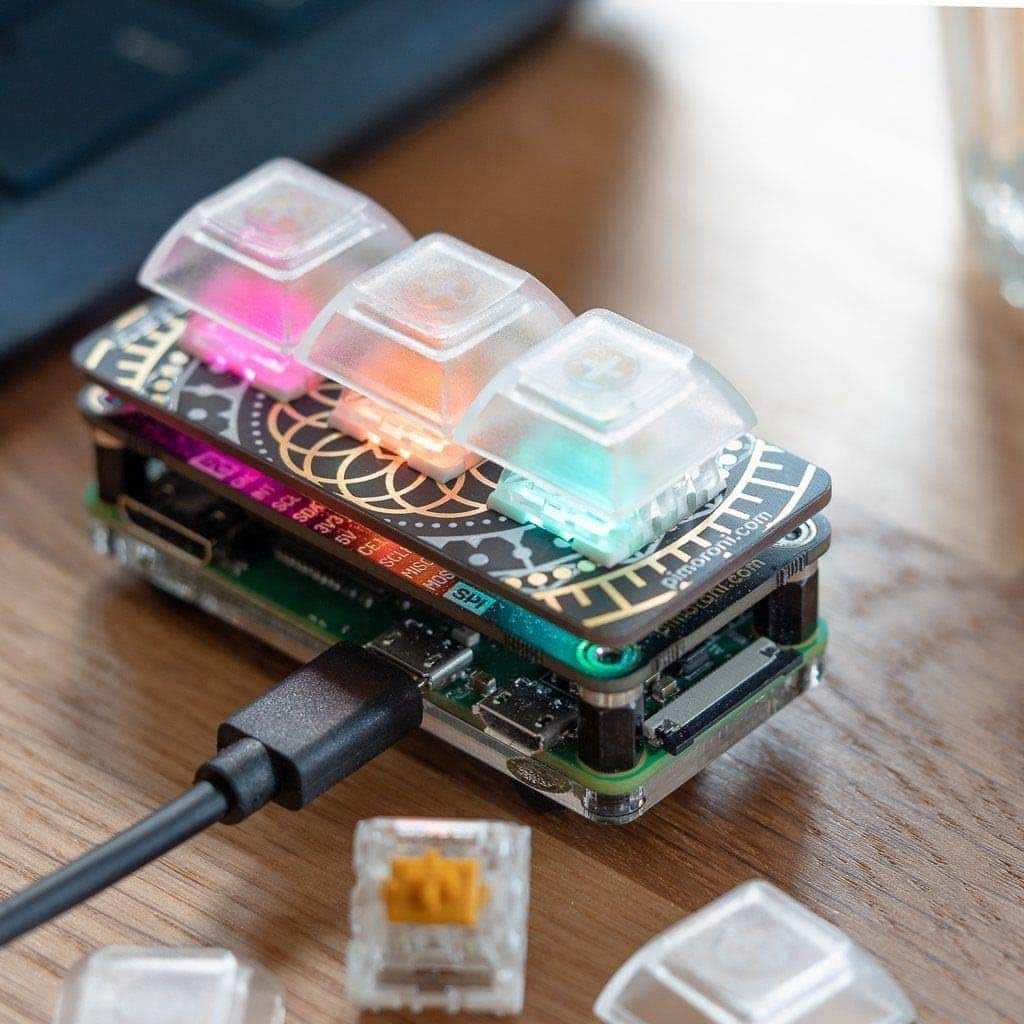
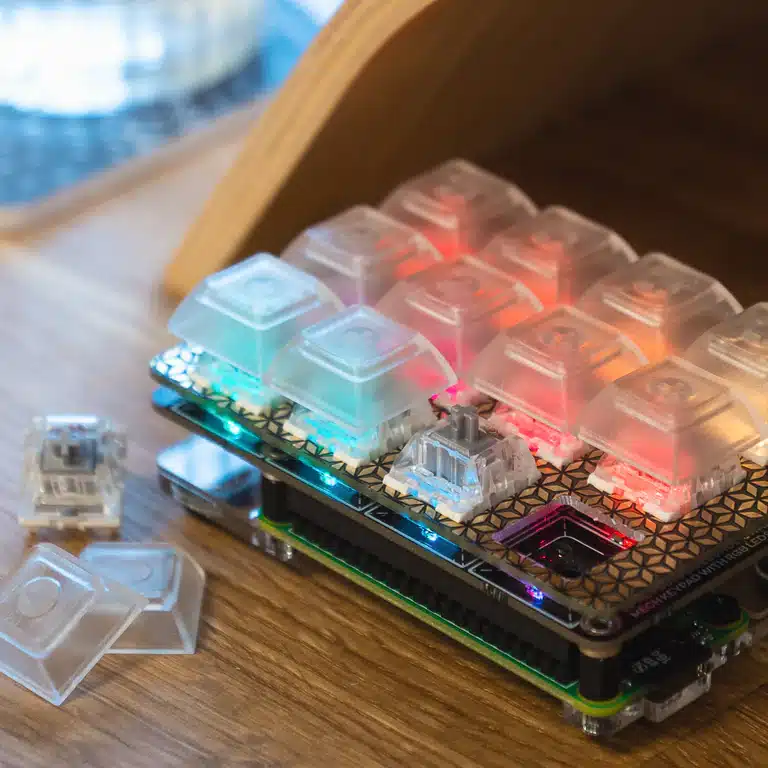
まずはPimoroniの12キーや3キーのKeybowを紹介します。
一番新しいのはKeybow2040ですが、持っていないので詳しくはわかりません。より改造しやすくなっているようですね。
| モデル名 | Keybow MINI | Keybow | Keybow 2040 |
|---|---|---|---|
 |  |  | |
| キー配置 | 3キー 1 × 3 列 | 12キー 3 × 4 列 | 16キー 4 × 4 列 |
| コントローラー | Raspberry Pi Zero系 (背面に別途装着) | RP2040チップ (基板上に内蔵) | |
| 接続端子 | Micro USB | USB Type-C | |
| キースイッチ | Kailhメカニカル(ホットスワップ) | ||
| バックライトLED | APA102 RGB LED | ||
| ファームウェア | Keybow OS (Luaベース) | Keybow OS (Luaベース) | CircuitPython |
| Pimoroni直販価格 | 約 £22.50 (※生産終了) | 約 £50.00前後 (※生産終了) | 約 £39.00 (現行販売中) |
| 国内相場(参考) | 約 3,500円〜4,500円 | 約 7,000円〜9,000円 | 約 8,500円〜9,500円 |
※価格は1ポンド=190円で計算。価格にはRaspberry Pi Zero本体の代金は含まれていません。
Keybow(12キー)とKeybow MINI(3キー)を持っていますが、今回は12キーのKeybowをHomeAssistantのスイッチとして使います。(10キーとしては使い道がなかったので)
KeybowをHomeAssistantで使えるようにする
古いKeybowなのであまり役に立たない情報かもしれませんが、新しめのKeybow 2040の参考になるかもしれませんのでメモ程度に書いておきます。
必要なもの
HomeAssistantをすでに構築していることが前提になります。
Raspberry Pi 5にRaspberry OSを焼いてその上にHomeAssistant Superviser(アプリ・HACSが使えるようになる)をインストールしたらDockerにインストールされました。
- HomeAssistantサーバー
- Keybow 12キー
- Raspberry Pi Zero(Raspberry Pi Zero V1.3だったら別途Bluetoothドングル必要)
- Bluetoothドングル(Raspberry Pi Zero WHであれば不要)OTAハブで接続
困ったのはOTA使用可のUSBハブでないとBluetoothドングルが使えず、直接Raspberry Pi Zero V1.3の真ん中のMicroUSBポートにさしても使えず、OTAが使えるUSBケーブルでも自分の持っているBluetoothドングルが使えなかった。なので最初に使えていたUSBハブ(OTA)をそのまま使うことにした。
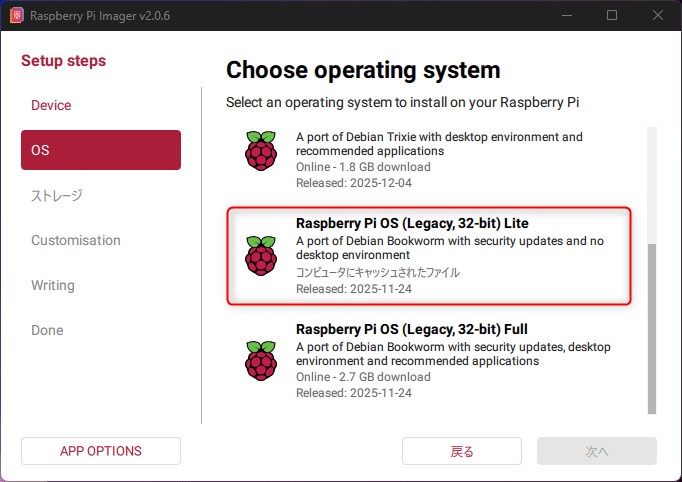
Raspberry Pi OS Liteで運用、SDカードにインストール
Keybowをキーボードとして使うには通常Keybow OSを使いますが、HomeAssistantで使うので、Raspberry Pi OS Lite(Legacy 32bit)を使います。
必要な設定
PythonスクリプトファイルをRaspberry Pi Zeroに1つ、HomeAssistantサーバー(Raspberry Pi 5)に1つと、HomeAssistantのyaml2箇所に追記します。
- Raspberry Pi 5:HomeAssistant上ではなくRaspberry OSの自分のホームにPythonファイルを置きます。
- HomeAssistant(YAMLファイル2つ):Raspberry Pi 5にインストールしたHomeAssistantのautomations.yaml、Configration.yamlの2つのファイルを追記、アプリのFile editorを使うとHomeAssistantのサイトから追記可能
- Keybow(Raspberry Pi Zero):自分のホームにPythonファイルを置きます。
HomeAssistant(Raspberry Pi 5)側の設定
Pythonスクリプト
まずは自分のホーム(自分の場合は/home/go)にPythonファイルを置きます。
Path:/home/go/bt-keybow.py エンコードはUTF-8、改行コードはLinuxのLFで保存しておいてください。(/home/goは自分の場合はgoユーザーなので置き換えてください。)
import socket
import threading
import time
import requests
import json
import re

last_sent_cmds = {}

# --- 設定項目 ---
BT_PORT = 1
LISTEN_PORT = 5000
HA_URL = "http://127.0.0.1:8123/api/webhook/keybow_event"

server_sock = None
client_sock = None

def send_to_home_assistant(payload_dict):
    """HAのWebhookへ辞書データを投げる"""
    try:
        requests.post(HA_URL, json=payload_dict, timeout=5)
        print(f"Sent to HA: {payload_dict}")
    except Exception as e:
        print(f"HA send error: {e}")

def handle_network_commands():
    """HAからの指示(curl)をZeroへ流す"""
    global client_sock
    net_sock = socket.socket(socket.AF_INET, socket.SOCK_STREAM)
    net_sock.setsockopt(socket.SOL_SOCKET, socket.SO_REUSEADDR, 1)
    net_sock.bind(('0.0.0.0', LISTEN_PORT))
    net_sock.listen(5)
    print(f"Network listener started on port {LISTEN_PORT}")

    while True:
        try:
            conn, addr = net_sock.accept()
            raw_data = conn.recv(1024).decode('utf-8')
            if raw_data:
                # 正規表現で LED:数字:状態 または LED_数字_状態 を抽出
                # 例: GET /LED:11:ON HTTP/1.1 -> LED:11:ON を見つける
                #match = re.search(r'LED[:_]\d+[:_](?:ON|OFF)', raw_data)
                # 数字、カンマ、ON/OFF すべてを通すように変更
                match = re.search(r'LED[:_]\d+[:_](?:ON|OFF|[\d,]+)', raw_data)
                if match:
                    cmd = match.group().replace('_', ':')
                    btn_num = cmd.split(':')[1]

                    # デバッグ用のプリント
                    print(f"Accepted command: {cmd}")

                    # 前回の命令と同じなら、2秒以内は無視する
                    if last_sent_cmds.get(btn_num) == cmd:
                        continue

                    if client_sock:
                        try:
                            client_sock.sendall((cmd + "\n").encode('utf-8'))
                            print(f"Final Command to Zero: {cmd}")
                            last_sent_cmds[btn_num] = cmd
                        except Exception as e:
                            client_sock = None

                else:
                    print(f"Debug: No pattern match in: {raw_data.strip().splitlines()[0]}")
            conn.close()
        except Exception as e:
            print(f"Network error: {e}")

def main():
    global server_sock, client_sock

    # ネットワークスレッド開始
    threading.Thread(target=handle_network_commands, daemon=True).start()

    server_sock = socket.socket(socket.AF_BLUETOOTH, socket.SOCK_STREAM, socket.BTPROTO_RFCOMM)

    try:
        server_sock.bind(("00:00:00:00:00:00", BT_PORT))
        server_sock.listen(1)
    except OSError as e:
        print(f"Bind error: {e}")
        return

    while True:
        print("Waiting for Zero to connect via Bluetooth...")
        try:
            client_sock, client_info = server_sock.accept()
            print(f"Zero connected: {client_info}")

            # 受信バッファの残りを保持する変数
            buffer = ""
            while True:
                data_raw = client_sock.recv(1024).decode('utf-8')
                if not data_raw:
                    break

                buffer += data_raw
                # 改行区切りで1メッセージずつ処理(重要!)
                while "\n" in buffer:
                    line, buffer = buffer.split("\n", 1)
                    line = line.strip()
                    if not line: continue

                    print(f"From Zero: {line}")

                    try:
                        if line.startswith('{'):
                            payload = json.loads(line)
                        else:
                            payload = {"event": line, "click_type": "single"}

                        threading.Thread(target=send_to_home_assistant, args=(payload,), daemon=True).start()
                    except json.JSONDecodeError:
                        print(f"Invalid JSON received: {line}")

        except Exception as e:
            print(f"Bluetooth connection lost: {e}")
        finally:
            if client_sock:
                client_sock.close()
                client_sock = None
            time.sleep(1)

if __name__ == "__main__":
    main()
HomeAssistant(Raspberry Pi 5)でservice登録
上記Pythonスクリプトをsystemdサービスに登録してラズパイが再起動しても自動で起動するようにします。
sudo vim /etc/systemd/system/bt_keybow.service[Unit]
Description=Bluetooth Receiver for Keybow
After=bluetooth.target
[Service]
ExecStart=/usr/bin/python3 /home/go/bt-keybow.py
WorkingDirectory=/home/go
StandardOutput=inherit
StandardError=inherit
Restart=always
User=go
[Install]
WantedBy=multi-user.targetsudo systemctl start bt_keybow.serviceKeybow側の設定
こちらはRaspberry OSの自分のホーム(例:/home/go)にPythonスクリプトを置きます。
KeybowのPythonスクリプト
Path:/home/go/keybow-ha.py
スクリプトが長いのはバックライトのグラデーションをレインボーなどといろいろ変更できるようにしているからです。
import keybow
import socket
import time
import colorsys
import math
import random
import threading
import json

# --- 設定項目 ---
TARGET_ADDRESS = "D8:3A:DD:D5:54:6A"
PORT = 1

led_mode = "animation"
anim_type = 0
brightness = 0.4
sock = None
button_states = [None] * 12
pressed_keys = [False] * 12
connecting = False

# クリック判定用
click_counts = [0] * 12
last_press_time = [0] * 12
timers = [None] * 12

def connect_to_pi5():
    global sock, connecting
    if connecting: return
    connecting = True
    try:
        new_sock = socket.socket(socket.AF_BLUETOOTH, socket.SOCK_STREAM, socket.BTPROTO_RFCOMM)
        new_sock.settimeout(5)
        new_sock.connect((TARGET_ADDRESS, PORT))
        new_sock.settimeout(None)
        sock = new_sock
        print("Bluetooth Connected to Pi 5!")
        threading.Thread(target=receive_loop, daemon=True).start()
    except:
        sock = None
    finally:
        connecting = False

def receive_loop():
    global sock, led_mode, button_states, anim_type
    while True:
        try:
            if sock is None: break
            data_raw = sock.recv(1024).decode('utf-8', errors='ignore')
            if not data_raw: break
            for line in data_raw.strip().split('\n'):
                if line.startswith("LED:"):
                    parts = line.split(":")
                    if len(parts) >= 3:
                        idx = int(parts[1])
                        val = parts[2]

                        if val == "OFF":
                            button_states[idx] = None
                        elif val == "ON":
                            button_states[idx] = (255, 255, 255)
                        else:
                            # "R,G,B" の形式で送られてきた色を解析
                            try:
                                r, g, b = map(int, val.split(','))
                                button_states[idx] = (r, g, b)
                            except:
                                # 解析に失敗したら白を点灯させる
                                button_states[idx] = (255, 255, 255)
        except: break
    sock = None


#星空で使う pixel_colors# 各LEDの状態を保存するリスト [色相(h), 明るさ(v)]
pixel_colors = [[0.0, 0.0] for _ in range(12)]

#バックライト キー1を押すごとに変更
def get_anim_rgb(i, step, anim_idx):
    x, y = i % 3, i // 3
    t = step / 20.0

    # 明るさを一括で30%程度に設定(255 * 0.3 ≒ 80)
    local_brightness = brightness if 'brightness' in globals() else 80

    # すべて anim_idx で統一
    if anim_idx == 0: # レインボー
        h = (step / 100.0 + i / 12.0) % 1.0
        return colorsys.hsv_to_rgb(h, 0.6, local_brightness)

    elif anim_idx == 1: # 暖色フェード
        h = (math.sin(t * 0.2) + 1) / 2 * 0.1
        return colorsys.hsv_to_rgb(h, 0.8, local_brightness)

    elif anim_idx == 2: # パルス(青)
        val = (math.sin(t) + 1) / 2
        return (0, 0, local_brightness * val)

    elif anim_idx == 3: # 走る光(白)
        val = 1.0 if (i == int(step/500) % 12) else 0.05
        return (local_brightness * val, local_brightness * val, local_brightness * val)

    elif anim_idx == 4: # スキャン(縦)
        val = 1.0 if (x == int(step/500) % 3) else 0.1
        return (local_brightness * val, 0, local_brightness * val)

    elif anim_idx == 5: # 森林の呼吸(緑)
        val = (math.sin(t * 0.5 + i) + 1) / 2
        return (0, local_brightness * val, 0.1 * local_brightness)

    elif anim_idx == 6: # サイバーパンク(ピンク/青)
        # step/30 に変更してスピードを少しゆっくりに調整
        if (i + int(step/30)) % 2 == 0:
            return (local_brightness, 0, local_brightness)
        return (0, local_brightness, local_brightness)

    elif anim_idx == 7: # スキャン(横)
        val = 1.0 if (y == int(step/500) % 4) else 0.1
        return (0, local_brightness * val, local_brightness * val)

    elif anim_idx == 8: # 水面
        val = (math.sin(t + x) + math.cos(t + y) + 2) / 4
        return (0, local_brightness * val, local_brightness)

    elif anim_idx == 9: # 琥珀 (修正: anim_type -> anim_idx, 誤ったvalを削除)
        h, s = 0.08, 0.9
        v = local_brightness * (0.3 + 0.2 * math.sin(step / 20 + i))
        return colorsys.hsv_to_rgb(h, s, v)

    elif anim_idx == 10: # パステル (修正: colorsysを使用するように変更)
        h = (step / 500) % 1.0
        s, v = 0.5, local_brightness * 0.4
        return colorsys.hsv_to_rgb(h, s, v)

    elif anim_idx == 11: # 原色
        h = (step / 100 + i / 12) % 1.0
        s, v = 1.0, local_brightness * 0.7
        return colorsys.hsv_to_rgb(h, s, v)

    elif anim_idx == 12: # 桜 (修正: randomを使用)
        h, s = 0.95, 0.3
        v = local_brightness * (0.3 + 0.2 * random.random())
        return colorsys.hsv_to_rgb(h, s, v)

    elif anim_idx == 13: # 蛍
        h, s = 0.15, 0.8
        v = local_brightness * (0.5 + 0.5 * math.sin(step / 40 + i)) * (0.3 if i % 2 == 0 else 0.1)
        return colorsys.hsv_to_rgb(h, s, v)

    elif anim_idx == 14: # 星空 (注意: pixel_colors配列が事前に必要です)
        if random.random() < 0.03:
            pixel_colors[i] = [random.random(), local_brightness]
        pixel_colors[i][1] *= 0.96
        h, s, v = pixel_colors[i][0], 0.5, pixel_colors[i][1]
        return colorsys.hsv_to_rgb(h, s, v)

    else:
        return (0.05, 0.05, 0.1)

def update_leds(step):
    global led_mode, button_states, pressed_keys, anim_type
    for i in range(12):
        if pressed_keys[i]:
            #keybow.set_led(i, 255, 255, 255)
            keybow.set_led(i, 80, 80, 80)
            continue
        if button_states[i] is not None:
            r, g, b = button_states[i]
            keybow.set_led(i, r, g, b)
            continue
        if led_mode == "off":
            keybow.set_led(i, 0, 0, 0)
            continue
        rgb = get_anim_rgb(i, step, anim_idx=anim_type)
        keybow.set_led(i, int(rgb[0]*255), int(rgb[1]*255), int(rgb[2]*255))

def send_to_ha_via_bluetooth(payload):
    """Bluetooth経由でPi 5にJSONを送信"""
    global sock
    if sock:
        try:
            msg = json.dumps(payload) + "\n"
            sock.send(msg.encode('utf-8'))
        except:
            pass

def finalize_click(index):
    global click_counts, anim_type, led_mode
    count = click_counts[index]
    click_counts[index] = 0
    timers[index] = None

    # 内部処理
    if index == 1 and count == 1:
        anim_type = (anim_type + 1) % 15
        led_mode = "animation"
    elif index == 2 and count == 1:
        led_mode = "off"

    # BluetoothでPi5へ送信
    payload = {
        "event": f"Button_{index}_Pressed",
        "click_type": "single" if count == 1 else "double" if count == 2 else "triple"
    }
    send_to_ha_via_bluetooth(payload)
    print(f"Key {index}: {payload['click_type']}")

def handle_key(index, state):
    global pressed_keys, last_press_time, click_counts, timers
    pressed_keys[index] = state

    if state:
        last_press_time[index] = time.time()
        if timers[index]:
            timers[index].cancel()
    else:
        duration = time.time() - last_press_time[index]
        if duration > 0.6:
            payload = {"event": f"Button_{index}_Pressed", "click_type": "hold"}
            send_to_ha_via_bluetooth(payload)
            click_counts[index] = 0
            print(f"Key {index}: hold")
        else:
            click_counts[index] += 1
            timers[index] = threading.Timer(0.3, finalize_click, [index])
            timers[index].start()

for i in range(12): keybow.on(i, handle_key)
step = 0
try:
    while True:
        step += 1
        if sock is None and not connecting: connect_to_pi5()
        update_leds(step)
        keybow.show()
        time.sleep(0.03)
except KeyboardInterrupt:
    keybow.set_all(0, 0, 0)
    keybow.show()
Raspberry Pi Zero(Keybow)のサービス登録
Keybow側も再起動時に自動でサービスが起動するようにします。
sudo vim /etc/systemd/system/keybow.service[Unit]
Description=Keybow to Home Assistant Bridge
After=bluetooth.target
[Service]
ExecStart=/usr/bin/python3 /home/go/keybow_ha.py
WorkingDirectory=/home/go
StandardOutput=inherit
StandardError=inherit
Restart=always
User=go
[Install]
WantedBy=multi-user.targetsudo systemctl start keybow.serviceWindowsからPythonスクリプトコピー
もし、シェルでRaspberry Pi OS Liteで直接Pythonスクリプトを書くのではなく、WindowsやMacで書いてコピーしたい場合は以下のようにしました。(例としてWindows11でやりました)
WindowsではRaspberry OS用のSDカードはbootfsフォルダがあるので、bootfsに作ったPythonスクリプト「keybow-ha.py」をコピーしておきます。
KeybowのRaspberry Pi OS Liteを起動してシェルに以下のようにPythonスクリプトを置きます。
cd ~
mv keybow-ha.py keybow-ha2.py #古いkeybow-ha.pyがあればバックアップしておく
cp /boot/firmware/keybow-ha.py ./
sudo systemctl restart keybow.service
sudo systemctl status keybow
WindowsのSDカード内ではbootfsフォルダでしたが、Raspberry OSになると/boot/firmwareで同じファイルを見れます。
Windows SDカード内:/bootfs/keybow-ha.py
=
Raspberry OS:/boot/firmware/keybow-ha.py
HomeAssistantのYAMLファイル2箇所に追記
Raspberry Pi 5にインストールしたHomeAssistantに戻って以下の2つのファイルに追記していきます。
HomeAssistantのautomations.yaml
HomeAssistantのautomations.yamlに以下を追記します。
Keybowの各キーに個別の機能を追加しています。そして夜になったらバックライトオフ、朝になったらバックライトをオンにするようにしました。
- id: keybow_8_ultimate_v3
  alias: Keybow 8 Ultimate (Dimming & Color Loops)
  trigger:
  - trigger: webhook
    webhook_id: keybow_event
  condition:
  - condition: template
    value_template: '{{ trigger.json.event == ''Button_8_Pressed'' }}'
  action:
  - choose:
    - conditions:
      - condition: template
        value_template: '{{ trigger.json.click_type == ''single'' }}'
      sequence:
      - action: switch.toggle
        target:
          entity_id: switch.chuangmi_212a01_4915_switch
    - conditions:
      - condition: template
        value_template: '{{ trigger.json.click_type == ''double'' }}'
      sequence:
      - action: light.turn_on
        target:
          entity_id: light.floor_lamp_0a2a
        data:
          brightness_pct: '{% set b = state_attr(''light.floor_lamp_0a2a'', ''brightness'')
            | default(0) | int %} {% set p = (b / 255 * 100) | round %} {% if p <
            25 %} 40 {% elif p < 55 %} 70 {% elif p < 85 %} 100 {% else %} 10 {% endif
            %}'
    - conditions:
      - condition: template
        value_template: '{{ trigger.json.click_type == ''triple'' }}'
      sequence:
      - choose:
        - conditions:
          - condition: template
            value_template: '{{ state_attr(''light.floor_lamp_0a2a'', ''color_temp_kelvin'')
              | default(0) | int <= 3000 }}'
          sequence:
          - action: light.turn_on
            target:
              entity_id: light.floor_lamp_0a2a
            data:
              color_temp_kelvin: 4500
        - conditions:
          - condition: template
            value_template: '{{ state_attr(''light.floor_lamp_0a2a'', ''color_temp_kelvin'')
              | default(0) | int <= 5000 }}'
          sequence:
          - action: light.turn_on
            target:
              entity_id: light.floor_lamp_0a2a
            data:
              color_temp_kelvin: 6500
        - conditions:
          - condition: template
            value_template: '{{ state_attr(''light.floor_lamp_0a2a'', ''color_temp_kelvin'')
              | default(0) | int > 5000 }}'
          sequence:
          - action: light.turn_on
            target:
              entity_id: light.floor_lamp_0a2a
            data:
              rgb_color:
              - 0
              - 255
              - 255
        - conditions:
          - condition: template
            value_template: '{% set rgb = state_attr(''light.floor_lamp_0a2a'', ''rgb_color'')
              | default([0,0,0]) %} {{ rgb[1] > 200 and rgb[2] > 200 and rgb[0] <
              100 }}'
          sequence:
          - action: light.turn_on
            target:
              entity_id: light.floor_lamp_0a2a
            data:
              rgb_color:
              - 191
              - 0
              - 255
        - conditions:
          - condition: template
            value_template: 'true'
          sequence:
          - action: light.turn_on
            target:
              entity_id: light.floor_lamp_0a2a
            data:
              color_temp_kelvin: 2000
    - conditions:
      - condition: template
        value_template: '{{ trigger.json.click_type == ''hold'' }}'
      sequence:
      - action: light.toggle
        target:
          entity_id: light.floor_lamp_0a2a
  mode: restart

- id: keybow_7_new_toggle
  alias: Keybow 7 Light Toggle Control
  trigger:
  - trigger: webhook
    webhook_id: keybow_event
  condition:
  - condition: template
    value_template: '{{ trigger.json.event == ''Button_7_Pressed'' }}'
  action:
  - choose:
    - conditions:
      - condition: template
        value_template: '{{ trigger.json.click_type == ''single'' }}'
      sequence:
      - action: light.toggle
        target:
          entity_id: light.e27_led_lamp2
    - conditions:
      - condition: template
        value_template: '{{ trigger.json.click_type == ''double'' }}'
      sequence:
      - action: light.toggle
        target:
          entity_id: light.e27_led_lamp1

- id: keybow_6_control
  alias: Keybow 6 Toggle
  trigger:
  - trigger: webhook
    webhook_id: keybow_event
  condition:
  - condition: template
    value_template: '{{ trigger.json.event == ''Button_6_Pressed'' }}'
  action:
  - action: switch.toggle
    target:
      entity_id: switch.chuangmi_m3_28ac_switch

- id: keybow_11_integrated
  alias: Keybow 11 Integrated (Single & Double)
  trigger:
  - trigger: webhook
    webhook_id: keybow_event
  condition:
  - condition: template
    value_template: '{{ trigger.json.event == ''Button_11_Pressed'' }}'
  action:
  - choose:
    - conditions:
      - condition: template
        value_template: '{{ trigger.json.click_type == ''single'' }}'
      sequence:
      - action: switch.toggle
        target:
          entity_id: switch.chuangmi_212a01_b9a1_switch
    - conditions:
      - condition: template
        value_template: '{{ trigger.json.click_type == ''double'' }}'
      sequence:
      - action: switch.toggle
        target:
          entity_id: switch.smart_plug_switch_1
  mode: restart
- id: keybow_10_control
  alias: Keybow 10 Toggle
  trigger:
  - trigger: webhook
    webhook_id: keybow_event
  condition:
  - condition: template
    value_template: '{{ trigger.json.event == ''Button_10_Pressed'' }}'
  action:
  - action: switch.toggle
    target:
      entity_id: switch.plug_lumi_158d000128a61d_ch0_lumi_158d000128a61d
- id: keybow_9_control
  alias: Keybow 9 Gateway Light (Robust RGB Loop)
  trigger:
  - trigger: webhook
    webhook_id: keybow_event
  condition:
  - condition: template
    value_template: '{{ trigger.json.event == ''Button_9_Pressed'' }}'
  action:
  - choose:
    - conditions:
      - condition: template
        value_template: '{{ trigger.json.click_type == ''single'' }}'
      sequence:
      - action: light.toggle
        target:
          entity_id: light.lumi_gateway_v3_light
    - conditions:
      - condition: template
        value_template: '{{ trigger.json.click_type == ''double'' }}'
      sequence:
      - action: light.turn_on
        target:
          entity_id: light.lumi_gateway_v3_light
        data:
          rgb_color: "{% set rgb = state_attr('light.lumi_gateway_v3_light', 'rgb_color')
            | default([255, 255, 255]) %} {% set r = rgb[0] %} {% set g = rgb[1] %}
            {% set b = rgb[2] %}\n{# 暖色判定:赤が強く、青が弱い場合 -> 白へ #} {% if r > 240 and b
            < 100 %}\n  [255, 255, 255]\n{# 白判定:赤と青が共に高い場合 -> 寒色へ #} {% elif r > 240
            and b > 200 %}\n  [150, 200, 255]\n{# それ以外(寒色など) -> 暖色へ #} {% else %}\n
            \ [255, 150, 50]\n{% endif %}\n"
          brightness: 255

- id: keybow_0_control
  alias: Keybow 0 Fan Control (Restore Points)
  mode: restart
  trigger:
    - trigger: webhook
      webhook_id: keybow_event
  condition:
    - condition: template
      value_template: "{{ trigger.json.event == 'Button_0_Pressed' }}"
  action:
    - choose:
        # --- シングルクリック:初期の正常に動作していた設定 ---
        - conditions:
            - condition: template
              value_template: "{{ trigger.json.click_type == 'single' }}"
          sequence:
            - action: scene.turn_on
              target:
                entity_id: scene.sirinkuhuan
            - action: input_boolean.toggle
              target:
                entity_id: input_boolean.fan_state_helper

        # --- ダブルクリック:安定していた風量循環設定 ---
        - conditions:
            - condition: template
              value_template: "{{ trigger.json.click_type == 'double' }}"
          sequence:
            - action: input_select.select_next
              target:
                entity_id: input_select.fan_scene_helper
            - delay: "00:00:01"
            - action: scene.turn_on
              target:
                entity_id: >
                  {% set current = states('input_select.fan_scene_helper') %}
                  {% if current == 'Strong' %} scene.sirinkuhuan_qiang
                  {% elif current == 'Medium' %} scene.sirinkuhuan_zhong
                  {% else %} scene.sirinkuhuan_ruo
                  {% endif %}
            - action: input_boolean.turn_on
              target:
                entity_id: input_boolean.fan_state_helper

- id: keybow_5_control
  alias: Keybow 5 Fan Light Control (With LED Sync)
  trigger:
  - trigger: webhook
    webhook_id: keybow_event
  condition:
  - condition: template
    value_template: '{{ trigger.json.event == ''Button_5_Pressed'' }}'
  action:
  - choose:
    - conditions:
      - condition: template
        value_template: '{{ trigger.json.click_type == ''single'' }}'
      sequence:
      - action: scene.turn_on
        target:
          entity_id: scene.sirinkuhuanraito_tokuru
      - action: input_boolean.toggle
        target:
          entity_id: input_boolean.fan_light_mode
    - conditions:
      - condition: template
        value_template: '{{ trigger.json.click_type == ''double'' }}'
      sequence:
      - choose:
        - conditions:
          - condition: template
            value_template: '{{ is_state(''input_boolean.fan_light_mode'', ''off'')
              }}'
          sequence:
          - action: scene.turn_on
            target:
              entity_id: scene.sirinkuhuanraito_taku
          - action: input_boolean.turn_on
            target:
              entity_id: input_boolean.fan_light_mode
        - conditions:
          - condition: template
            value_template: 'true'
          sequence:
          - action: scene.turn_on
            target:
              entity_id: scene.sirinkuhuanraito_tong_chang
          - action: input_boolean.turn_on
            target:
              entity_id: input_boolean.fan_light_mode


- id: keybow_3_sesame_control
  alias: Keybow 3 Sesame Control (Single & Double)
  trigger:
    - trigger: webhook
      webhook_id: keybow_event
  condition:
    - condition: template
      value_template: '{{ trigger.json.event == "Button_3_Pressed" }}'
  action:
    - choose:
        # シングルクリック:エントランス解錠
        - conditions:
            - condition: template
              value_template: '{{ trigger.json.click_type == "single" }}'
          sequence:
            - action: light.toggle
              target:
                entity_id: light.sesami_hotuto_2

        # ダブルクリック:玄関ドア (5 Pro)
        - conditions:
            - condition: template
              value_template: '{{ trigger.json.click_type == "double" }}'
          sequence:
            - if:
                - condition: state
                  entity_id: lock.sesami_5_pro
                  state: "locked"
              then:
                - action: lock.unlock
                  target:
                    entity_id: lock.sesami_5_pro
              else:
                - action: lock.lock
                  target:
                    entity_id: lock.sesami_5_pro
  mode: restart


- id: keybow_led_sync_final_v3
  alias: Keybow LED Sync (Specific Fix for 3 and 11)
  trigger:
    - trigger: state
      entity_id:
        - light.e27_led_lamp2
        - switch.chuangmi_m3_28ac_switch
        - switch.chuangmi_212a01_b9a1_switch # 11キー用
        - switch.smart_plug_switch_1          # 11キー用
        - switch.plug_lumi_158d000128a61d_ch0_lumi_158d000128a61d
        - light.lumi_gateway_v3_light
        - switch.chuangmi_212a01_4915_switch
        - input_boolean.fan_state_helper
        - input_boolean.fan_light_mode
        - lock.sesami_5_pro                  # 3キー用
  condition:
    - condition: time
      after: "07:00:00"
      before: "21:00:00"
  action:
    - choose:
        # --- 【3キー専用】施錠:緑 / 解錠:赤 ---
        - conditions:
            - condition: template
              value_template: "{{ trigger.entity_id == 'lock.sesami_5_pro' }}"
          sequence:
            - action: shell_command.keybow_led_on
              data:
                btn: 3
                color: "{% if is_state('lock.sesami_5_pro', 'locked') %}0,255,0{% else %}255,0,0{% endif %}"

        # --- 【11キー専用】両方ONの時のみ赤 / それ以外は消灯 ---
        - conditions:
            - condition: template
              value_template: "{{ trigger.entity_id in ['switch.chuangmi_212a01_b9a1_switch', 'switch.smart_plug_switch_1'] }}"
          sequence:
            - if:
                - condition: state
                  entity_id: switch.chuangmi_212a01_b9a1_switch
                  state: "on"
                - condition: state
                  entity_id: switch.smart_plug_switch_1
                  state: "on"
              then:
                - action: shell_command.keybow_led_on
                  data: { btn: 11, color: "255,0,0" }
              else:
                - action: shell_command.keybow_led_off
                  data: { btn: 11 }

        # --- 【その他のキー】3と11を完全に除外 ---
        - conditions:
            - condition: template
              value_template: >
                {{ trigger.entity_id not in [
                  'lock.sesami_5_pro',
                  'switch.chuangmi_212a01_b9a1_switch',
                  'switch.smart_plug_switch_1'
                ] }}
          sequence:
            - action: "{% if trigger.to_state.state == 'on' %} shell_command.keybow_led_on {% else %} shell_command.keybow_led_off {% endif %}"
              data:
                btn: >
                  {% set mapper = {
                    'light.e27_led_lamp2': 7,
                    'switch.chuangmi_m3_28ac_switch': 6,
                    'switch.plug_lumi_158d000128a61d_ch0_lumi_158d000128a61d': 10,
                    'light.lumi_gateway_v3_light': 9,
                    'switch.chuangmi_212a01_4915_switch': 8,
                    'input_boolean.fan_state_helper': 0,
                    'input_boolean.fan_light_mode': 5
                  } %} {{ mapper[trigger.entity_id] }}
  mode: restart

- id: keybow_morning_resync
  alias: Keybow Morning State Resync (08:00)
  trigger:
    - platform: time
      at: '08:00:00'
  action:
    # 3キーの朝の復元
    - action: shell_command.keybow_led_on
      data:
        btn: 3
        color: "{% if is_state('lock.sesami_5_pro', 'locked') %}0,255,0{% else %}255,0,0{% endif %}"

    # 11キーの朝の復元
    - choose:
        - conditions:
            - condition: state
              entity_id: switch.chuangmi_212a01_b9a1_switch
              state: 'on'
            - condition: state
              entity_id: switch.smart_plug_switch_1
              state: 'on'
          sequence:
            - action: shell_command.keybow_led_on
              data: { btn: 11, color: "255,0,0" }
        - conditions:
            - condition: state
              entity_id: switch.chuangmi_212a01_b9a1_switch
              state: 'on'
          sequence:
            - action: shell_command.keybow_led_on
              data: { btn: 11, color: "255,255,255" }

    # その他の標準キーの復元
    - repeat:
        for_each:
          - { entity: 'light.e27_led_lamp2', btn: 7 }
          - { entity: 'switch.chuangmi_m3_28ac_switch', btn: 6 }
          - { entity: 'switch.plug_lumi_158d000128a61d_ch0_lumi_158d000128a61d', btn: 10 }
          - { entity: 'light.lumi_gateway_v3_light', btn: 9 }
          - { entity: 'switch.chuangmi_212a01_4915_switch', btn: 8 }
          - { entity: 'input_boolean.fan_state_helper', btn: 0 }
          - { entity: 'input_boolean.fan_light_mode', btn: 5 }
        sequence:
          - if:
              - condition: template
                value_template: "{{ is_state(repeat.item.entity, 'on') }}"
            then:
              - action: shell_command.keybow_led_on
                data: { btn: "{{ repeat.item.btn }}" }


- id: keybow_night_dimmer
  alias: Keybow Night Mode (Off at 21:00)
  trigger:
  - platform: time
    at: '21:00:00'
  action:
  - repeat:
      for_each: [0, 3, 5, 6, 7, 8, 9, 10, 11] # 3を追加
      sequence:
      - action: shell_command.keybow_led_off
        data:
          btn: '{{ repeat.item }}'
  - action: input_boolean.turn_off
    target:
      entity_id:
      - input_boolean.fan_state_helper
      - input_boolean.fan_light_mode
keybow_night_dimmerで21時になったらスイッチがオンになっているバックライトをオフにします。(バックライトのグラデーションは手動でキー2を押してオフにしています。)
HomeAssistantのconfiguration.yaml
shell_commandに以下を追加します。
shell_command:
  keybow_led_on: 'curl -m 1 "http://127.0.0.1:5000/LED:{{ btn }}:{{ color | default("ON") }}"'
  keybow_led_off: 'curl -m 1 "http://127.0.0.1:5000/LED:{{ btn }}:OFF"'
Keybowのキーキャップと完成の図
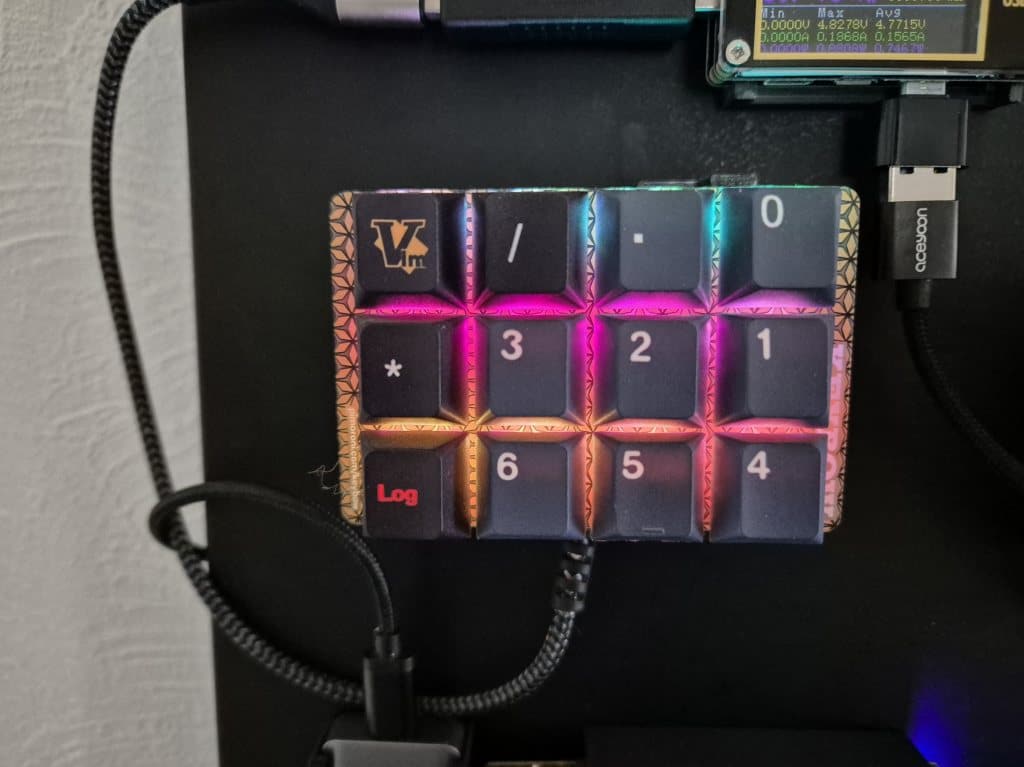
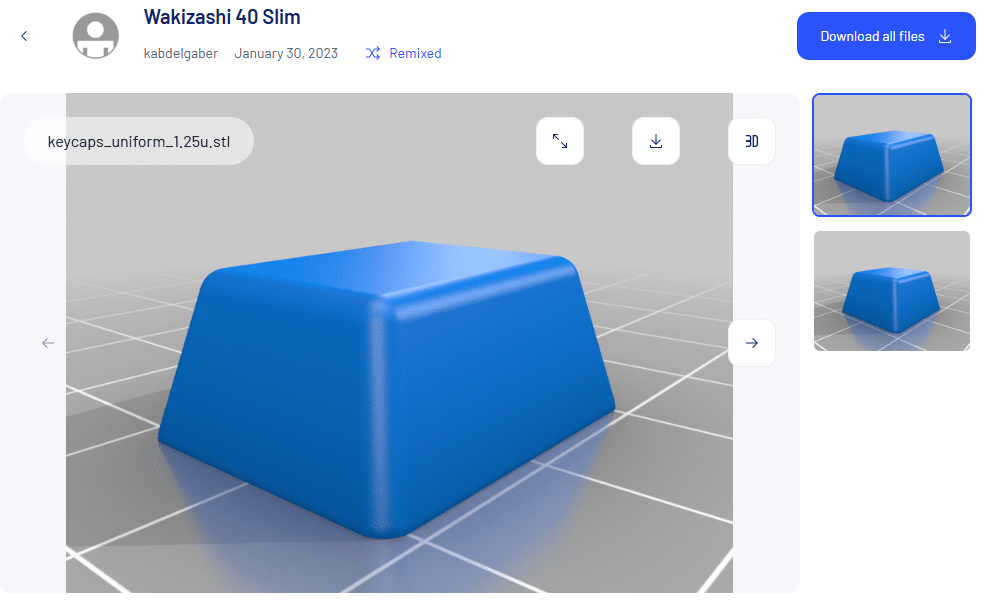
Keybowのキーキャップは透明なのでバックライトがちょっと眩しく、何も書いてないのでどれがどのキーか判断しずらいのでキーキャップを3Dプリンターで作ることにしました。
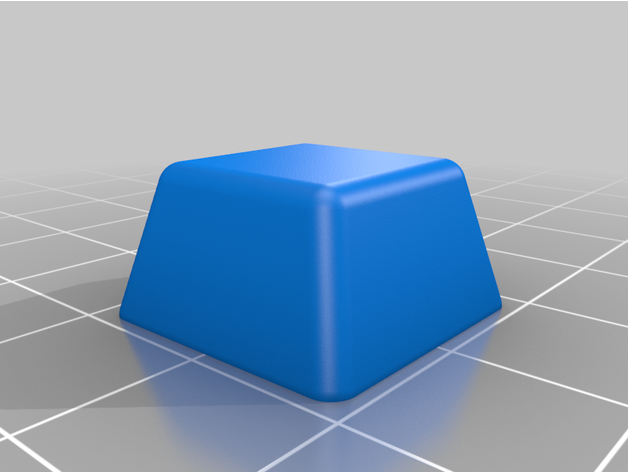
3Dモデル
thingiverse.comにCherry MXロープロファイルがあったのでこちらをお借りしてキーキャップを作る。
3Dプリンターと安いPLAフィラメント
フィラメントはアマゾンで最安値のPLAフィラメント eSUN 基本的な PLAフィラメント 1.75mm、ePLA 3Dプリンティングフィラメントを使っています。
3Dプリンターは去年買ったCreality K1Cで0.08mmでプリントしました。このプリンターはもう面倒をあまり見ることなく放置&手間なしで使えるようになりました。
仕上がりは良でキーキャップとして使うには悪くないと思います。
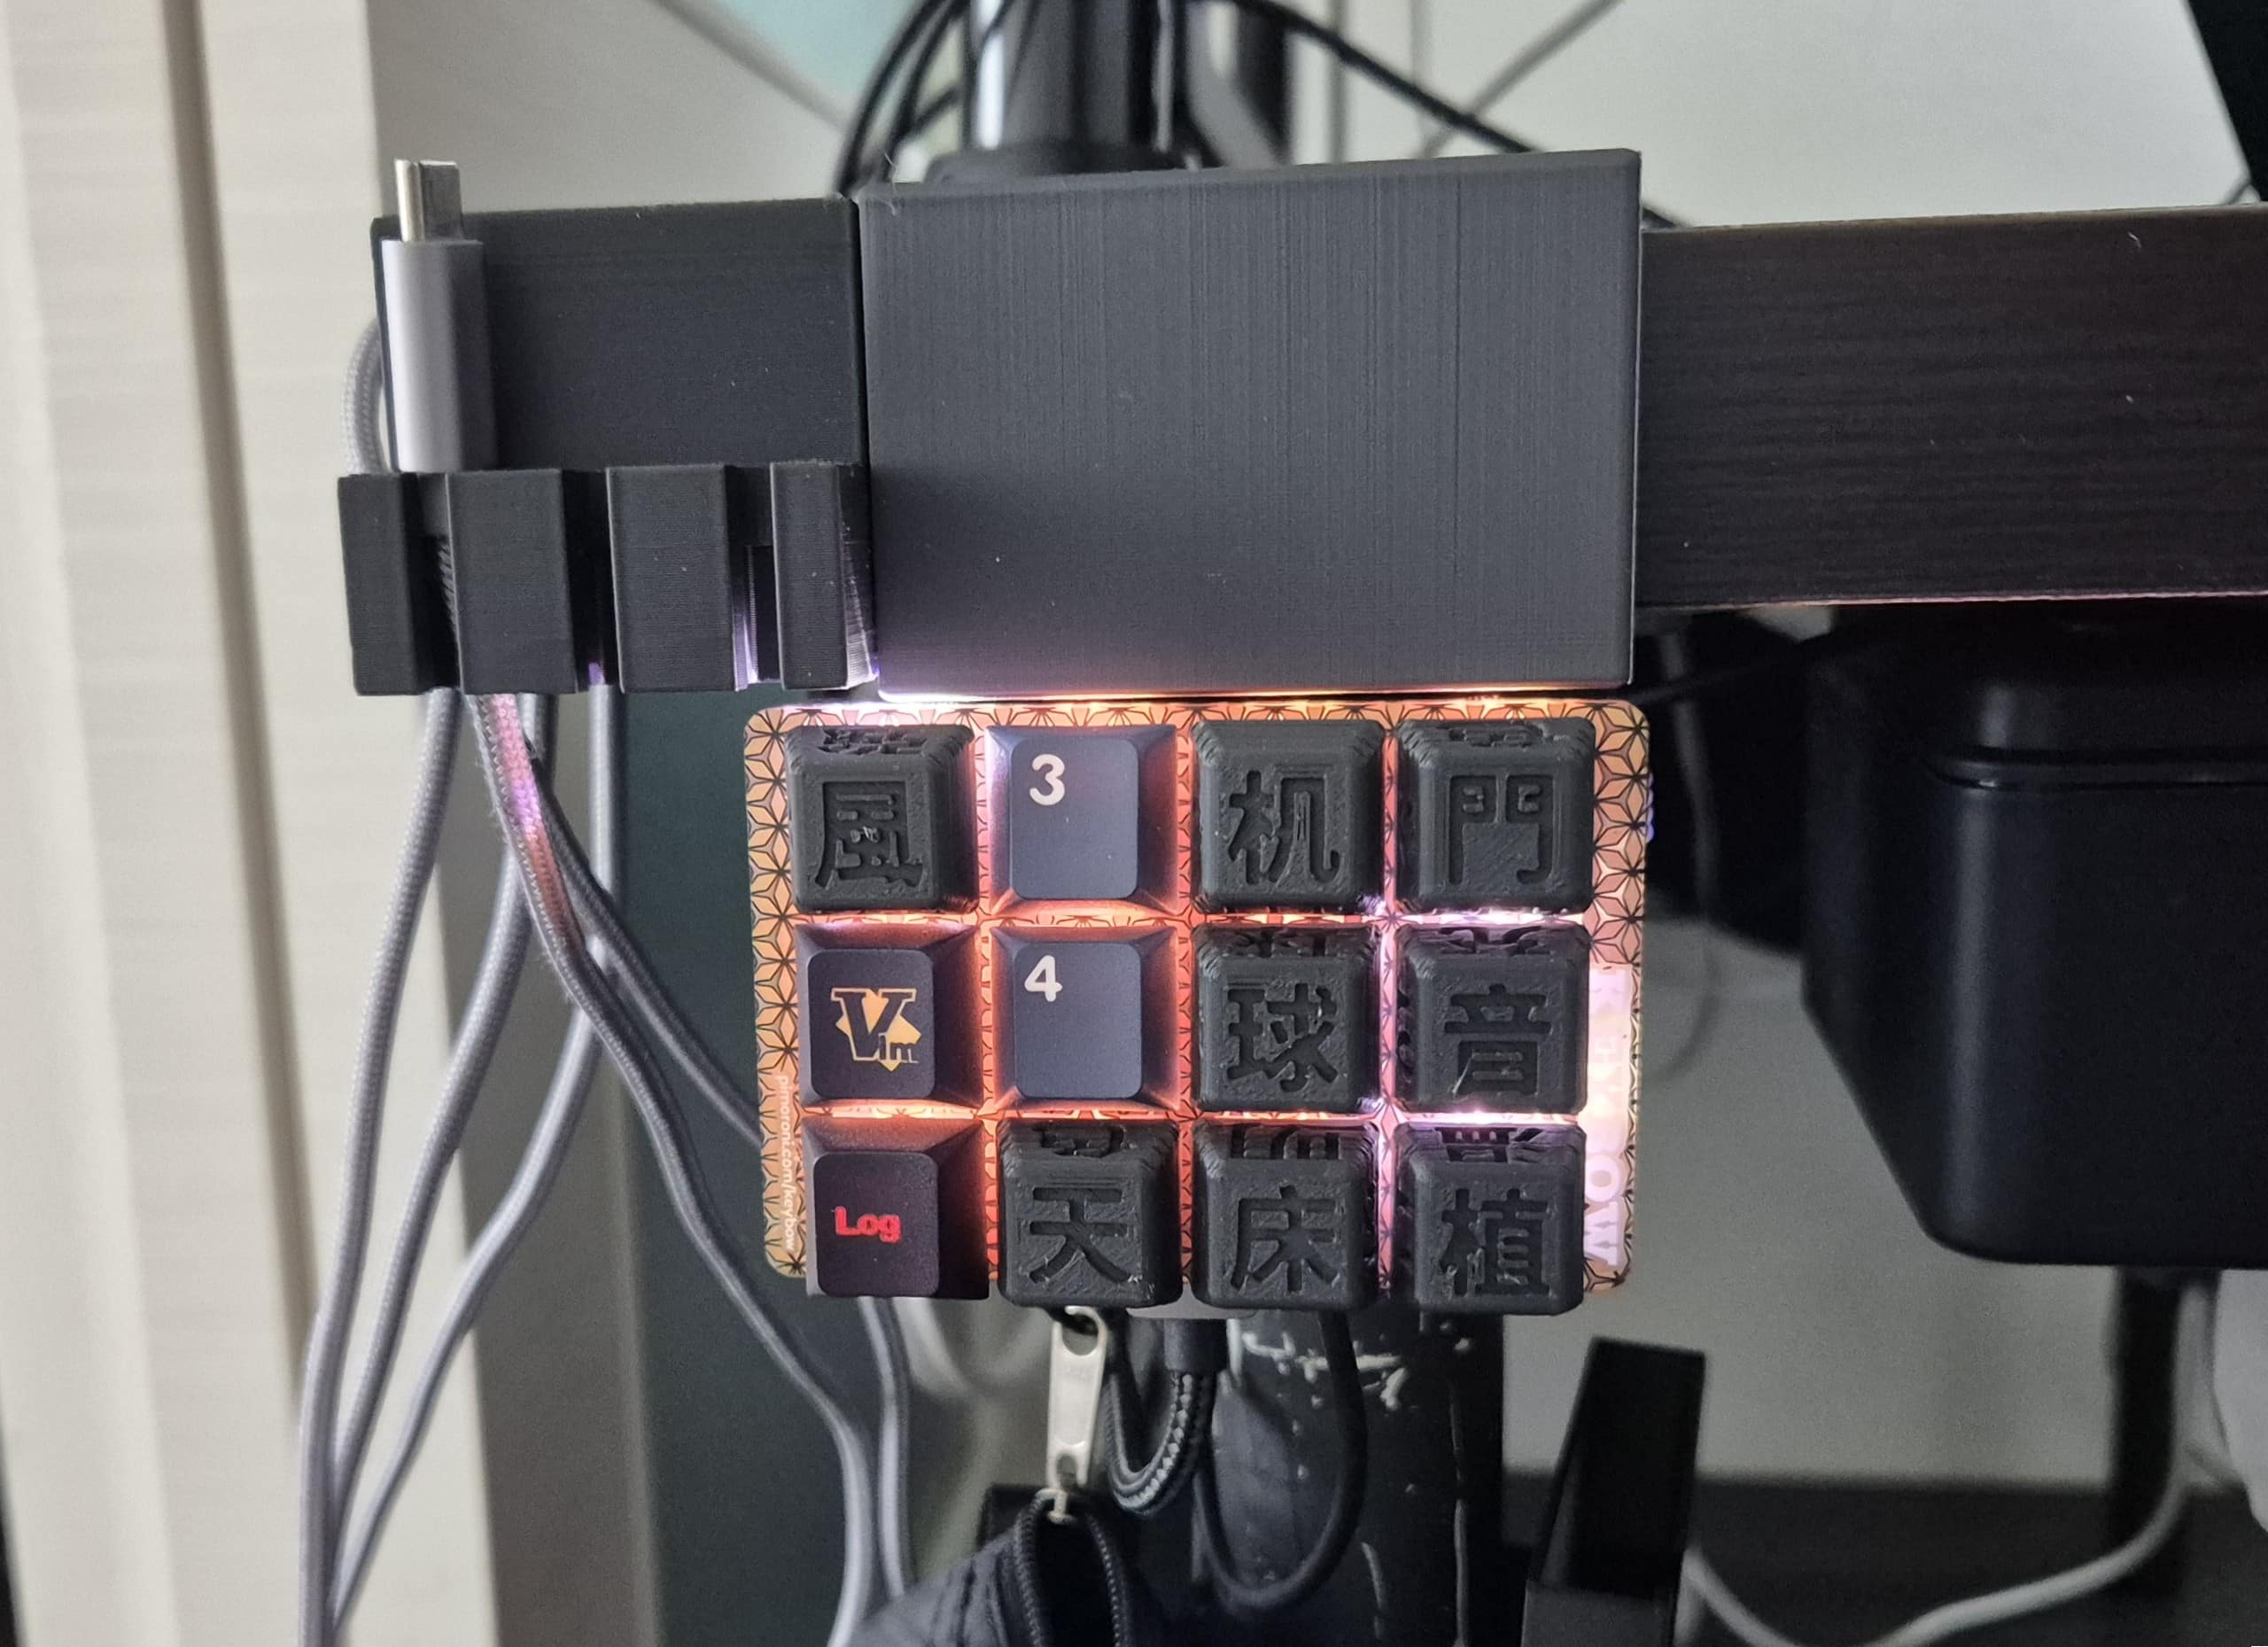
キー4はブランクで、キー1(Vimのキー)はバックライトのグラデーションを変更、キー2(Logのキー)はグラデーションオフにした。
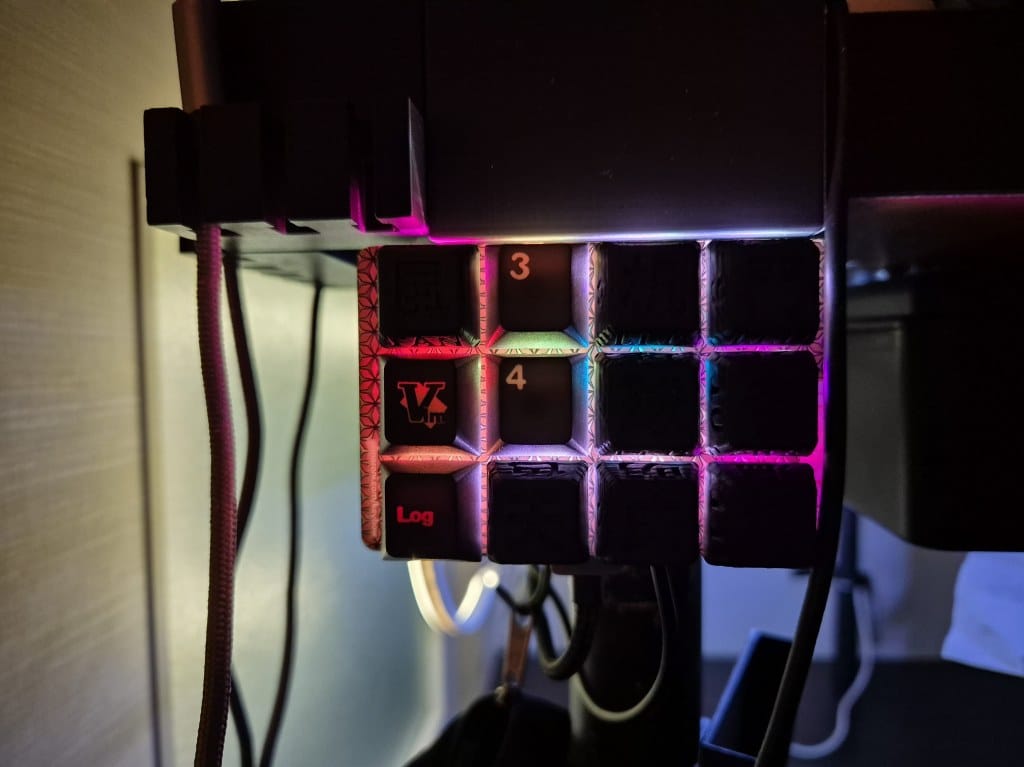
バックライトで半透明にしたかったけど無理だった・・・
やはり3Dプリンターで作ったキーキャップは半透明にならずに暗い。
なので文字の部分を白で塗ってみます。
キーキャップのキーを判断できるように白く塗る
ちょっと近くで見るとだいぶ荒い塗りだけどこれで暗くてもある程度はどれがどのスイッチか判別できる。
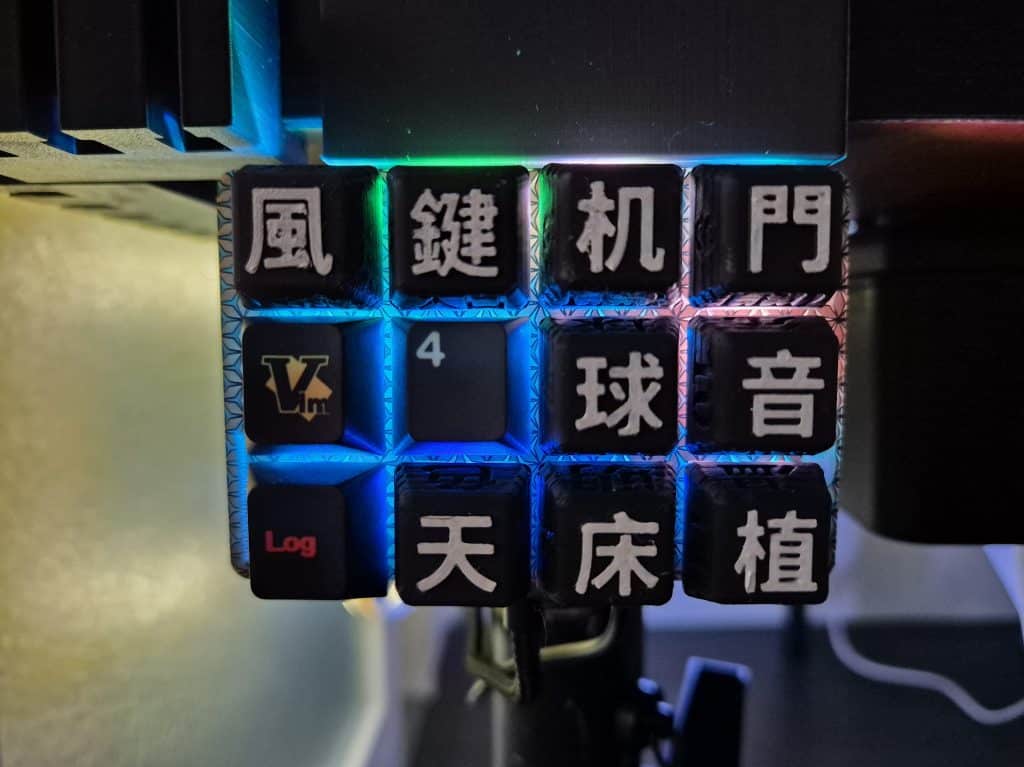
漢字部分の白い色はぺんてる 油性ペン ホワイト 中字 X100W-MDで塗りました。何回も重ね塗りしたのでなかなか白色が乾かなくて指で押したら白が付いてしまうのがネック、そのうち乾くでしょう。
Kwybow 各キーの役割
一応どのキーがどの動作をするかまとめてみました。
- 0 風:ダクトレール 3つのシーリングファンの扇風機 Singleトグル
- 1 :バックライトのグラデーション 押すごとに変更する
- 2 :バックライトSingleトグル
- 3 鍵:Single玄関セサミ鍵、Double1階エントランス鍵 セサミボット2
- 4:未使用
- 5 天:ダクトレール 3つのシーリングファンの照明 Singleトグル
- 6 机: デスクのLED間接照明 Singleオトグル
- 7 球: ダクトレール Single電球No1トグル、 Double電球No2トグル
- 8 床:Switchbotのフロアライト Single LEDトグル、Double色変更(3種)
- 9 門:XiaomiのゲートウェイLED Singleトグル、Double色変更(3種)
- 10 音:ダクトレールに設置したUSBアダプターの電源 Singleトグル
- 11 植:植物温室 SingleLED照明トグル、Double ホットカーペットトグル
現状これくらいです。もう一般家庭ではあまりオートメーション化する物はない?かもしれません。
リモコンで操作するタイプのシーリングファンライトとXiaomi電球・XiaomiスイッチにUSBアダプタを装着↓
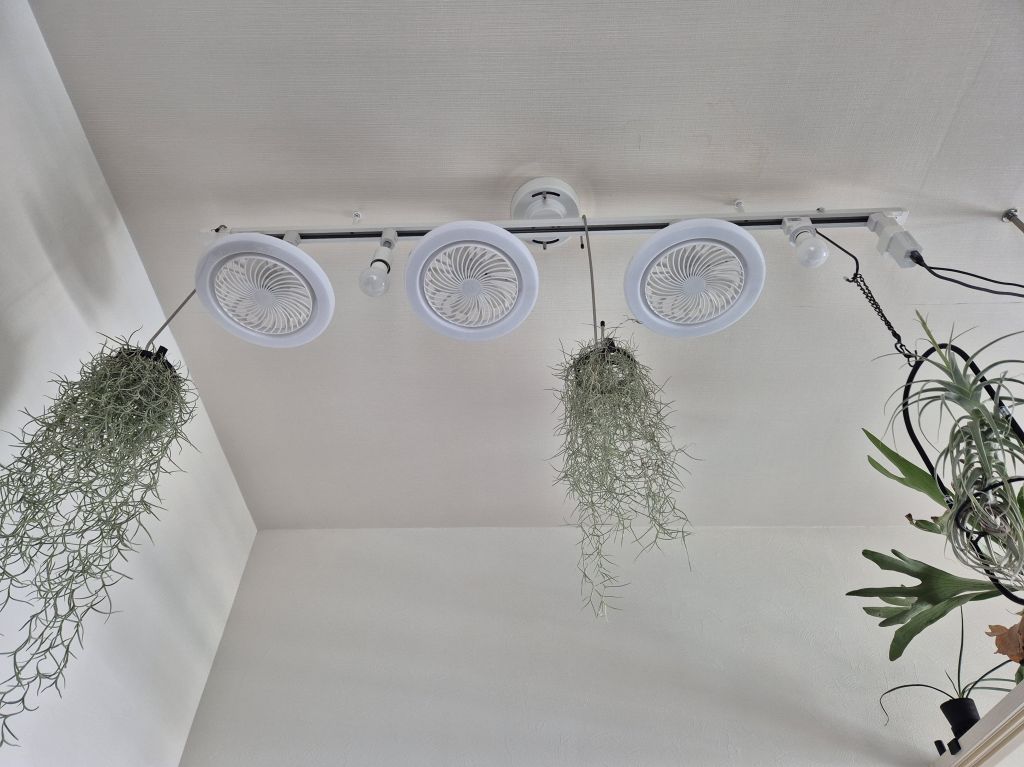
シーリングファンライトはリモコン式でTuya学習リモコンと連携してシーンで操作するが、3つのうち2個が動作したりしなかったりと使い勝手が悪い。アリエク10ドルくらいのシーリングファンライトなので仕方がないけど・・・
一軒家・ガレージ付きだったら色々と自動化するガジェットはあるのかもしれませんが賃貸のマンション暮らしだとあまり自動化するものはなさそう。
KeybowをHAスイッチ化まとめ
ちょっと大変でしたけど、古いKeybowを有効活用することができました。
自作キーボードもHomeAssistantと連携できればもっと欲しくなる(使い道ないと思うけど)なぁ。


コメント